> For the complete documentation index, see [llms.txt](https://docs.finout.io/llms.txt). Markdown versions of documentation pages are available by appending `.md` to page URLs; this page is available as [Markdown](https://docs.finout.io/billing-integrations/data-and-engineering-platforms/connect-to-confluent.md).
# Connect to Confluent
Confluent is a full-scale, advanced data [streaming platform](https://docs.confluent.io/platform/current/_glossary.html#term-event-streaming-platform) that facilitates seamless access storage, and management of continuous real-time data streams.
The Confluent cost center is available in the [MegaBill](/user-guide/inform/megabill.md), providing breakdowns by services, clusters, usage type (e.g., network write, storage), and network access type (e.g., Peered VCP, Internet).
This integration ensures a unified view of all associated costs, combining the environment's expenditures with its related cloud expenses. [Virtual Tags](/user-guide/inform/virtual-tags.md) can be utilized to further consolidate costs and obtain a comprehensive view.
{% hint style="info" %}
**Note**: To retrieve cost data from Confluent, use the following endpoint:\
`http://api.confluent.cloud/billing/v1/costs`
{% endhint %}
## **1. Connect Confluent to Finout**
1. Navigate to confluent cloud home.
2. Select the menu on the right and choose **Cloud API keys**.
3. Click on **Add** key.
4. Choose **Granular access**.
5. Select **Create a new one**, input a new service account name and description, and proceed (a new service account will be created).
6. Once the key is generated, an option to describe it appears. Click **Download** and continue.
## **2. Grant permissions to the cloud API key**
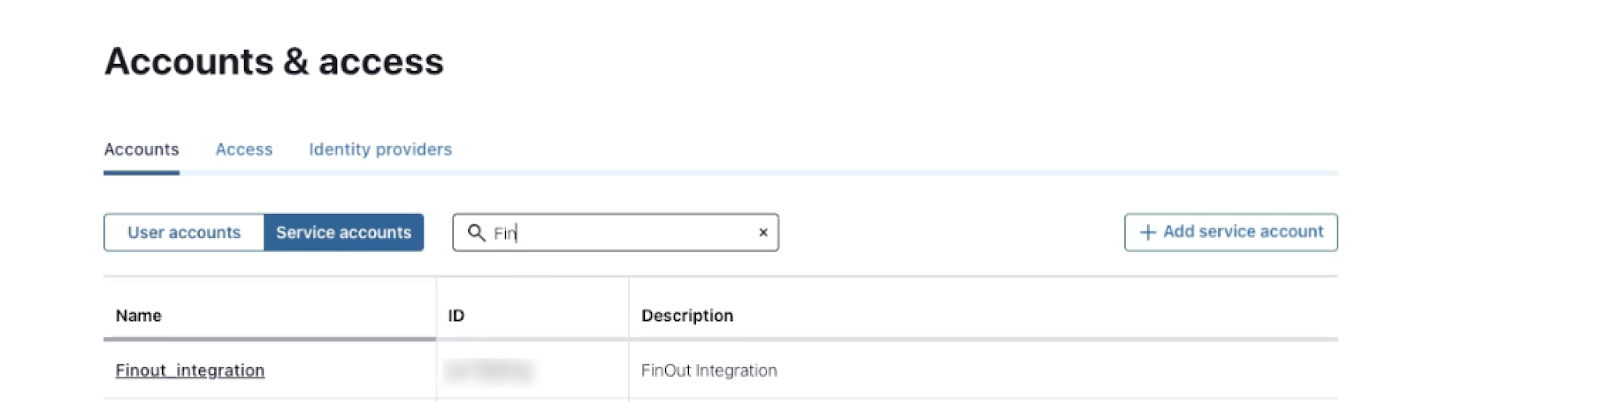
1. On the right menu, select **Accounts and Access**.

2. Navigate to **Service Accounts** under **Accounts**.
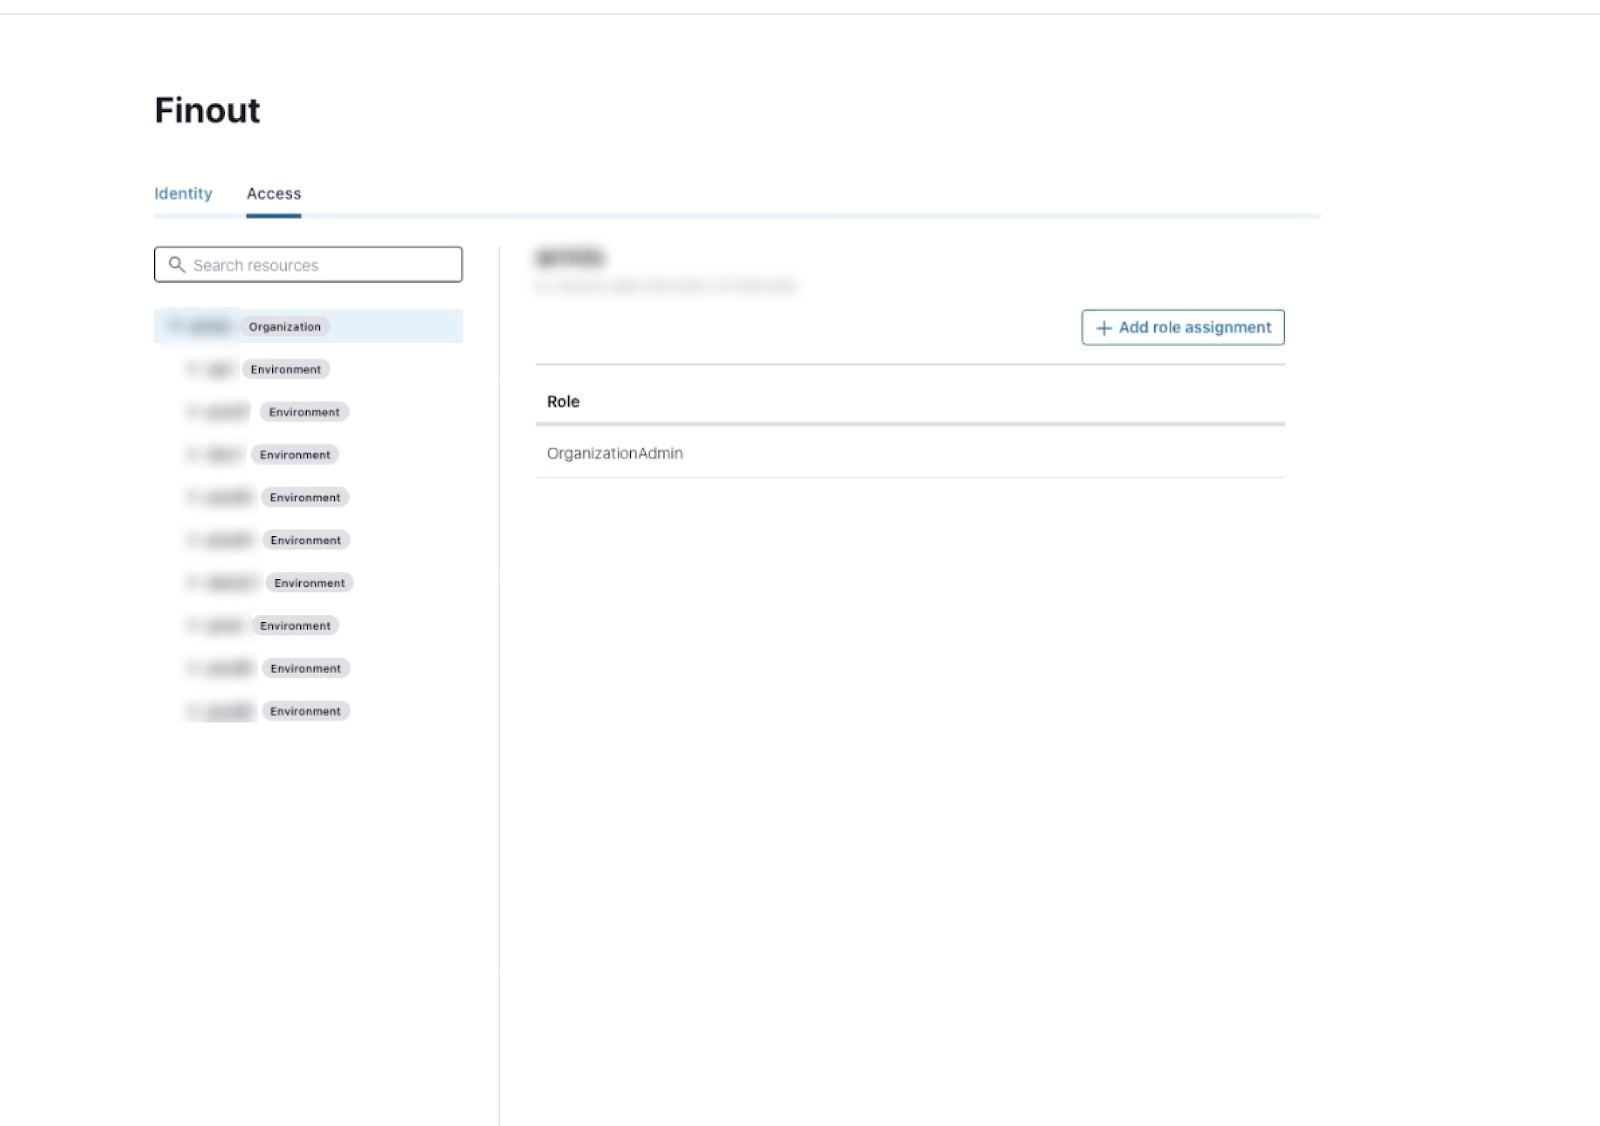
3. Search for the newly created service account and select it.
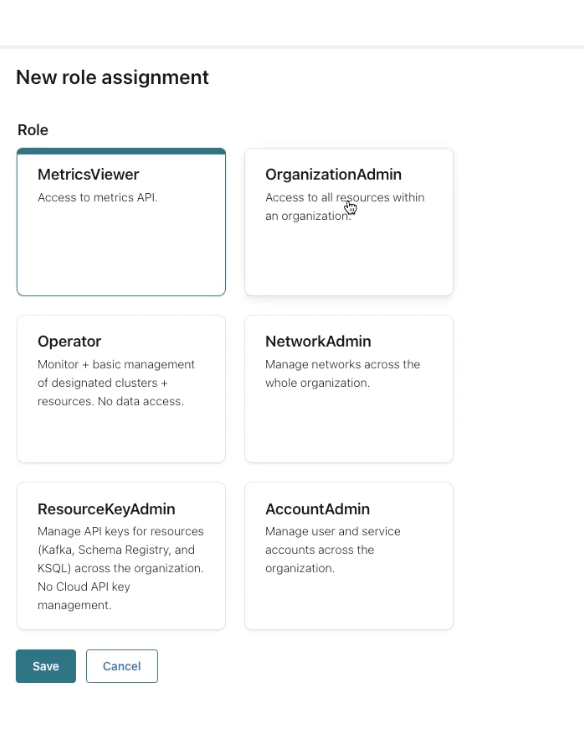
4. Select **Add role assignment** under organization.
5. Choose **BillingAdmin** and confirm this choice - crucial for successful integration.
## **3. Integrate Confluent with Finout**
1. In Finout, navigate to **Settings > Cost Centers**.
2. Under Confluent, click **Connect Now**.
You are taken to the **Connect Confluent** step.
3. Fill in the following fields:
1. API Key - generated in the first step
2. Secret - generated in the first step
4. Click **Complete Setup**. Your Cost Center is created - data should become available in Finout within 48 hours.
## FAQ
**How far back can Finout backfill Confluent cost data?**
Confluent's Costs API only exposes cost data with a start date up to one year in the past. This affects backfill as follows:
* **New Cost Centers**: Historical data can be backfilled for up to 12 months from the integration date. Data older than one year cannot be retrieved from Confluent and is not recoverable through the API.
* **Existing Cost Centers**: Finout retains accumulated daily-level data over time, so accounts with an existing Confluent Cost Center keep access to historical data beyond the one-year window.
---
# Agent Instructions
This documentation is published with GitBook. GitBook is the documentation platform designed so that both humans and AI agents can read, navigate, and reason over technical content effectively. Learn more at gitbook.com.
## Querying This Documentation
If you need additional information that is not directly available in this page, you can query the documentation by asking a question.
Perform an HTTP GET request on the following URL with the `ask` and `goal` query parameters:
```
GET https://docs.finout.io/billing-integrations/data-and-engineering-platforms/connect-to-confluent.md?ask=&goal=
```
`ask` is the immediate question: it should be specific, self-contained, and written in natural language.
`goal` is what the user is ultimately trying to achieve, the reason they need the answer. Sharing it helps GitBook give you a better, more relevant answer. A goal is most helpful when it describes the outcome the user wants rather than restating the question. For example, with `ask=how do I create an API token`, a goal like `automate deployments from our CI pipeline` lets GitBook tailor the answer to that use case.
The response will contain a direct answer to the question and relevant excerpts and sources from the documentation.
Use this mechanism when the answer is not explicitly present in the current page, you need clarification or additional context, or you want to retrieve related documentation sections.