# Financial Plans

## Financial Plan Overview <a href="#h_09b77ed4fc" id="h_09b77ed4fc"></a>

\
Every organization manages yearly budgets to plan annual spending. In cloud environments, every small change impacts cost, and it's essential to have the necessary budget data to foresee future costs and plan for your company's yearly budget. Managing cloud spending effectively involves addressing challenges such as uncontrolled costs due to pay-as-you-go models, lack of usage visibility, and complex pricing structures. Additionally, issues like difficulty in cost allocation, inefficient resource management, and decentralized governance further complicate cost management.

Finout’s solution enables you to plan your company's annual financial plan and expected budgets so that you can allocate accordingly by planning, managing, and monitoring cloud spending. This ensures alignment with business goals and prevents budget overruns. Financial plans enable you to create a budget per unit cost to address the fluctuation of unit-based pricing and cloud spend. For example, if your organization has numerous teams and groups that require budget management, you can utilize Finouts virtual tags to create a structured financial plan tailored to your organization and effectively manage the annual budget.

**You will learn how to**:

1. [Create a Financial Plan](#h_5bfec57ebb) - Configure your financial plan, arrange its hierarchy, and set up forecasting models.
2. [Input Data to your Financial Plan](#h_da5b90eeee) - Add budget and forecast values via manual entry or bulk upload.
3. [Manage your Financial Plan](#h_95e1938f42) - Manage your financial plan by filtering and adding custom lines.

## Create a Financial Plan <a href="#h_5bfec57ebb" id="h_5bfec57ebb"></a>

Start creating your financial plan by following the configuration, hierarchy, and forecast steps below.

{% hint style="info" %}
**Note**: Only Admins can create a financial plan.
{% endhint %}

**To add a financial plan**:

### 1. Financial Plan Configuration <a href="#h_de652a6435" id="h_de652a6435"></a>

1. In Finout, navigate to **Financial Plans**.<br>

   <figure><img src="https://downloads.intercomcdn.eu/i/o/20224412/d71f9e08e102f090b0736906/image.png?expires=1727308800&#x26;signature=b11da35c537c3b7ff118ee4fb94fe90076d2d780c055a36094cf9d8da23ebc20&#x26;req=0tVtx1z%2BrTVk2hj99dpg6sq6tMoYGJfAgI1GgSQp7hI1EvFBQ46stJhYD6sv%0A4SK7KxalFuQSDtVXtQJvOaME%0A" alt=""><figcaption></figcaption></figure>

   <figure><img src="https://3858159242-files.gitbook.io/~/files/v0/b/gitbook-x-prod.appspot.com/o/spaces%2FWqjB2puKXPDR7L86FX2e%2Fuploads%2FP7mAGFow1tAiUeJWMqbz%2FFP.png?alt=media&#x26;token=ee0b1325-fe7a-4e55-b11c-82a16cff37ff" alt=""><figcaption></figcaption></figure>
2. Click **Add Financial Plan** on the top right of the page.\
   The **Financial Plan Configuration** window appears.

   <figure><img src="https://3858159242-files.gitbook.io/~/files/v0/b/gitbook-x-prod.appspot.com/o/spaces%2FWqjB2puKXPDR7L86FX2e%2Fuploads%2FUakdJQ4zzRUHclPfxqQN%2Fimage.png?alt=media&#x26;token=1f9b2c03-c262-41de-a2f5-285eed2e1d99" alt=""><figcaption></figcaption></figure>
3. Configure your financial plan:
   1. **Financial plan name**: Enter a financial plan name.
   2. **Financial plan duration**: Select the duration of your financial plan by year.
   3. **Start period**: Select the start period by year and month.
   4. **Financial plan cost type**: Select a financial plan cost type. For more information, see [Cost and Usage Types](https://docs.finout.io/get-started-with-finout/cost-and-usage-types).
   5. [**ACL permissions**](https://docs.finout.io/cross-platform-features/list-of-cross-platform-features/acl-permissions):

      You can set **read** and **write** permissions as either **Public**, **Private**, and **Shared**. Permission for an object is granted if a user or group have a role with the proper permission and also ACL permission to access the object. By default, ACL read and write permissions follow the account’s default configuration.

      <div align="left"><figure><img src="https://3858159242-files.gitbook.io/~/files/v0/b/gitbook-x-prod.appspot.com/o/spaces%2FWqjB2puKXPDR7L86FX2e%2Fuploads%2FUBSaiFXMUs3YOa0irK6A%2Fimage.png?alt=media&#x26;token=644caf7a-fcfc-46d5-a85b-bd38edcf33c7" alt=""><figcaption></figcaption></figure></div>

      * **Modes of ACL Permissions:**
        * **Public:** Grants access to anyone in the organization that has Role-Based Access Control (RBAC).
        * **Private:** Restricts access to admins and the user who created the object.
        * **Shared:** Limits access to specific users or groups that have Role-Based Access Control (RBAC).

          <div data-gb-custom-block data-tag="hint" data-style="info" class="hint hint-info"><p><strong>Note</strong>: Admins and creators always retain access.</p></div>

          <div align="left"><figure><img src="https://3858159242-files.gitbook.io/~/files/v0/b/gitbook-x-prod.appspot.com/o/spaces%2FWqjB2puKXPDR7L86FX2e%2Fuploads%2F27KL2RmzFFl6qBfehjvh%2Fimage.png?alt=media&#x26;token=b8dabe01-47d7-46ce-9192-8edf230ac2fa" alt=""><figcaption></figcaption></figure></div>
4. Click **Next**.\
   The configuration of your plan is completed. The next step is to structure the hierarchy of your plan.

### 2. Financial Plan Hierarchy <a href="#h_8eb672e0cc" id="h_8eb672e0cc"></a>

<figure><img src="https://3858159242-files.gitbook.io/~/files/v0/b/gitbook-x-prod.appspot.com/o/spaces%2FWqjB2puKXPDR7L86FX2e%2Fuploads%2Fc6gPYKmnx8M2wu09c9Rc%2Fimage.png?alt=media&#x26;token=03acd1b8-9f21-44c6-93ff-60dc3def892b" alt=""><figcaption></figcaption></figure>

1. Click **Select Keys**.\
   The available keys appear for selection.

   <figure><img src="https://3858159242-files.gitbook.io/~/files/v0/b/gitbook-x-prod.appspot.com/o/spaces%2FWqjB2puKXPDR7L86FX2e%2Fuploads%2F2inRMcWQmRAX0muzYFuI%2Fimage.png?alt=media&#x26;token=275c36e9-55e8-4480-8f6c-4fbb49610fa5" alt=""><figcaption></figcaption></figure>

2. Select the desired keys and click **Select**.

   <div data-gb-custom-block data-tag="hint" data-style="info" class="hint hint-info"><p><strong>Note</strong>: Financial plans support up to 1000 line items. Ensure that the selected keys do not exceed the 1000 line item limit.</p></div>

   The keys appear in the **Financial Plan Keys & Hierarchy** window.\
   ​

   <figure><img src="https://3858159242-files.gitbook.io/~/files/v0/b/gitbook-x-prod.appspot.com/o/spaces%2FWqjB2puKXPDR7L86FX2e%2Fuploads%2FDJoIfwJZq0Z4v74F7CtI%2Fimage.png?alt=media&#x26;token=06f2bd21-57b3-4c02-8ac8-f32db4154477" alt=""><figcaption></figcaption></figure>

3. You can arrange the keys by dragging and dropping each one. This order defines the hierarchy of the keys in the financial plan.

   <div data-gb-custom-block data-tag="hint" data-style="info" class="hint hint-info"><p><strong>Note</strong>: Hierarchy order cannot be changed once the plan is created.</p></div>

4. Under **Financial Plan Cost Filters**, click **Filters**.\
   The filter component window appears.\
   ​

   <figure><img src="https://3858159242-files.gitbook.io/~/files/v0/b/gitbook-x-prod.appspot.com/o/spaces%2FWqjB2puKXPDR7L86FX2e%2Fuploads%2FPaMPJSLmDmRRvQJ8FqV8%2Fimage.png?alt=media&#x26;token=91dc5950-ead0-44c7-97e6-7f220e7d57d0" alt=""><figcaption></figcaption></figure>

5. Choose to include or exclude the costs of specific items on the financial plan.

   <div data-gb-custom-block data-tag="hint" data-style="info" class="hint hint-info"><p><strong>Note</strong>: Filters cannot be changed once the plan is created.</p></div>

   ​

   Hover over a key to include or exclude it in the plan:

   * **Mark** an item to include it in the plan.
   * **Exclude** an item to remove its cost from the row.

6. Click **Apply Filters**.

   <div data-gb-custom-block data-tag="hint" data-style="info" class="hint hint-info"><p>​<strong>Note</strong>: Excluded filters will still appear in the financial plan's line items, but their costs will be filtered out.</p></div>

7. Click **Next**.\
   The financial plan hierarchy is complete.. The next step is to customize your plan.

### 3. Financial Plan Customizations  <a href="#h_849ac68586" id="h_849ac68586"></a>

<figure><img src="https://3858159242-files.gitbook.io/~/files/v0/b/gitbook-x-prod.appspot.com/o/spaces%2FWqjB2puKXPDR7L86FX2e%2Fuploads%2FFBJooDvUsyx1cL9M1M41%2Fimage.png?alt=media&#x26;token=c59fd3fe-c28e-4c3a-b636-bed411e8dc6f" alt=""><figcaption></figcaption></figure>

1. Select two metrics to compare and define how delta is calculated. The customized delta will appear in the financial plan's details table and the financial plan's dashboard, aligning with your planning and analysis needs.

   The metrics options are:&#x20;

   * Actual Cost
   * Forecast
   * Run Rate
   * Budget

     <div data-gb-custom-block data-tag="hint" data-style="info" class="hint hint-info"><p><strong>Note</strong>: Delta calculation requires two different metrics.</p></div>

2. Click **Next**.\
   The Delta Customization is complete. The next step is Forecast Configuration.

### 4. Forecast Configuration <a href="#h_849ac68586" id="h_849ac68586"></a>

{% hint style="info" %}
**Note**: You can skip this step if you prefer to use your own forecasts.
{% endhint %}

<figure><img src="https://3858159242-files.gitbook.io/~/files/v0/b/gitbook-x-prod.appspot.com/o/spaces%2FWqjB2puKXPDR7L86FX2e%2Fuploads%2FCwpm4ahTZavlaNwsPFi9%2Fimage.png?alt=media&#x26;token=d20aa66d-6a56-469d-abb0-44d21167f68d" alt=""><figcaption></figcaption></figure>

You can choose one of the following options:

* [Monthly Seasonality Adjustment](#monthly-seasonality-adjustment): Calculate forecasts based on fluctuations from the prior year.
* [Driver-Based Forecasting](#driver-based-forecasting): Calculate forecasts by multiplying unit economics with projected volumes.

#### Monthly Seasonality Adjustment

1. Click **Select Period**.\
   The period dropdown appears.<br>

   <figure><img src="https://3858159242-files.gitbook.io/~/files/v0/b/gitbook-x-prod.appspot.com/o/spaces%2FWqjB2puKXPDR7L86FX2e%2Fuploads%2FuvjwSZhmcfQk1jJGGk1O%2Fimage.png?alt=media&#x26;token=cce799b3-fcf6-4f19-88bd-aed498482ada" alt=""><figcaption></figcaption></figure>
2. You can select one or more months from the past twelve months to establish the baseline forecast for the initial month of your financial plan. This baseline is the initial set of data that serves as a reference point for projecting the first month of each line item in the financial plan.\
   ​
3. View the displayed preview, which includes three line items from your new plan and their forecast for the first month.<br>

   <figure><img src="https://3858159242-files.gitbook.io/~/files/v0/b/gitbook-x-prod.appspot.com/o/spaces%2FWqjB2puKXPDR7L86FX2e%2Fuploads%2FQbYmLdg3AfhBNUqttNFp%2Fimage.png?alt=media&#x26;token=86ebf002-11cd-461f-9711-8b7ed0418a5e" alt=""><figcaption></figcaption></figure>

**Monthly Seasonality Adjustment:**

The Finout forecasting algorithm leverages historical data to predict future budgets in your financial plan.\
This algorithm calculates month-over-month percentage fluctuations for each line item over the past twelve months to establish a pattern of seasonal changes. These historical percentage changes are then applied to forecast each month in the upcoming financial plan.\
​\
​*Example*:\
It is August 2024, and you are planning for 2025. You want Finout to create a forecast using the baseline reference period from June and July 2024.\
​\
1\)**Baseline Calculation**\
Finout takes the average value of the months chosen to establish the baseline.\
​\
\- *Line Item*: Sub Service\
\- *June 2024 Amount*: $9,500\
\- *July 2024 Amount*: $10,500\
\- *Baseline*: $10,000\
​\
2\)**Monthly Growth Rate Calculation**\
Finout calculates the month-over-month percentage change for each line item based on historical data of the past twelve months (August 2023 to July 2024).

Each month in the forecasted year (2025) is projected using the percentage fluctuation from the corresponding month of the previous year to factor in seasonality.\
​\
​*For Example*: The percentage fluctuations for line X in the previous year were:\
\- February 2024 : 6% fluctuation\
\- March 2024: 5% fluctuation\
\- April 2024: 4% fluctuation\
\- This continues per month for the rest of the year\
​\
3\) **Forecast Calculation**\
Finout uses the Baseline and percentage fluctuations to project a forecast for 2025 for each line item.

{% hint style="info" %}
​**Note**: January’s forecast is the calculated baseline.
{% endhint %}

*For Example*: The forecast for line X will be calculated as follows:\
\- *January 2025 Forecast*: $10,000 (Baseline)\
\- *February 2025 Forecast*: $10,000 + ($10,000 x 6%) = $10,600\
\- *March 2025 Forecast*: $10,600 + ($10,600 X 5%) = $11,130\
\- *April 2025 Forcast*: $11,130 + ($11,130 x 4%) = $11,575.2\
\- This calculation is repeated for each subsequent month, using the updated value from the previous month and applying the growth rate to build a complete forecast for 2025.

4. You can optionally choose the following actions:
   1. Toggle on Automatically fill in the budget values with the forecast numbers.\
      ​

      <div align="left"><figure><img src="https://3858159242-files.gitbook.io/~/files/v0/b/gitbook-x-prod.appspot.com/o/spaces%2FWqjB2puKXPDR7L86FX2e%2Fuploads%2FKHs7ECxRYbFUaSlWJSIT%2Fimage.png?alt=media&#x26;token=ebddde51-7887-43f0-83aa-1be877eb88bc" alt=""><figcaption></figcaption></figure></div>
   2. Click **Skip** if you would like to add your own forecasts and not rely on Finouts’s automatic forecasting. This is available only if no reference period was selected.<br>

      <div data-gb-custom-block data-tag="hint" data-style="info" class="hint hint-info"><p><strong>Note</strong>: Forecast configuration cannot be changed once the plan is created, but you can always override a forecast and manually add your own forecasts. See <a href="#h_da5b90eeee">Input Data to Financial Plans</a>.</p></div>
5. Click **Next**.\
   The forecast navigation is complete.

#### Driver-Based Forecasting

<div align="left"><figure><img src="https://3858159242-files.gitbook.io/~/files/v0/b/gitbook-x-prod.appspot.com/o/spaces%2FWqjB2puKXPDR7L86FX2e%2Fuploads%2FQiylHtqza4wZR7KEiHX0%2Fimage.png?alt=media&#x26;token=66875bea-4dca-47ff-a6bd-ce04c762319e" alt=""><figcaption></figcaption></figure></div>

Driver-based forecasting calculates future costs by multiplying unit rates by the expected number of units. The process is divided into two steps: 1) **Calculate the Unit Rate** and 2) **Input Expected Unit Numbers.**

1. **Calculate the Unit Rate**:\
   Choose the *unit rate* for each financial plan line. To configure the driver-based forecast, select either **Automatic Unit Rate Calculation** or **Manual Unit Rate Calculation**.
   * **Automatic Unit Rate Calculation**<br>

     Finout calculates the unit rate from historical spend data. It analyzes past data, determines the cost per driver unit, and applies that rate to future usage.

     You pair historical cost with real telemetry (actual usage data).

     * The system calculates the unit rate automatically:\
       **unit rate = cost ÷ telemetry**
       * Best when you have reliable, measurable usage data.

     *Example*\
     Last month, a service cost 2,000 and processed 100 telemetry units.

     * **Unit rate = 2,000 ÷ 100 = 20**

     *Configure Unit Economics*:

     1. Configure Unit Economics by choosing which Cost and Telemetry data to calculate.<br>

        <div align="left"><figure><img src="https://3858159242-files.gitbook.io/~/files/v0/b/gitbook-x-prod.appspot.com/o/spaces%2FWqjB2puKXPDR7L86FX2e%2Fuploads%2FVJjIwjMfoBiokanf4tqs%2Fimage.png?alt=media&#x26;token=e9624b9b-4591-41e8-8f60-66fb8d0c1507" alt=""><figcaption></figcaption></figure></div>

     2. **Cost**:
        * **Filters**
        * **Group by**
        * Choose a **cost type**: See [Cost and Usage Types ](https://docs.finout.io/get-started-with-finout/cost-and-usage-types)for an explanation of all cost types.

     3. **Telemetry**: Telemetry refers to any data measurements that users intend to incorporate into Finout. This includes any metrics or data points that can be leveraged to enhance insights, enable monitoring, or assist in managing costs within the platform. See the [Telemetry documentation](https://docs.finout.io/telemetry-integrations/telemetry) for more information.
        1. **Telemetry name**
        2. **Filters**
        3. **Telemetry Group by**: The Group By selection must match the Cost Group By. If the selections do not align, no data will be displayed.

     4. Review or adjust unit economics.<br>

        <figure><img src="https://3858159242-files.gitbook.io/~/files/v0/b/gitbook-x-prod.appspot.com/o/spaces%2FWqjB2puKXPDR7L86FX2e%2Fuploads%2Fa4oMl8nfJ8CD4vLaaqvJ%2Fimage.png?alt=media&#x26;token=1f0b1ad3-9b66-4971-b948-ee5523fee133" alt=""><figcaption></figcaption></figure>
   * **Manual Unit Rate Calculation**\
     You define the unit rate yourself. This is useful when historical data is unreliable, prices are changing, or when you want complete control over the model.

     * You define the unit rate yourself; no automatic calculation.
     * Best when telemetry is missing, not relevant, or you want complete control over rates and assumptions.

     *Manually set unit rates*:

     1. Click **Manual Unit Rate Calculation**.<br>

        <div align="left"><figure><img src="https://3858159242-files.gitbook.io/~/files/v0/b/gitbook-x-prod.appspot.com/o/spaces%2FWqjB2puKXPDR7L86FX2e%2Fuploads%2FVxAw8U2LFKgkVZLw1Kex%2Fimage.png?alt=media&#x26;token=bdb64c75-c684-4c60-a65b-ebc6f5a5767e" alt=""><figcaption></figcaption></figure></div>
     2. Input unit rates.<br>

        <figure><img src="https://3858159242-files.gitbook.io/~/files/v0/b/gitbook-x-prod.appspot.com/o/spaces%2FWqjB2puKXPDR7L86FX2e%2Fuploads%2FfQaTMGz7SLKumP87pV3a%2Fimage.png?alt=media&#x26;token=abcb6c19-c4ac-4a58-8862-556a41ee6317" alt=""><figcaption></figcaption></figure>
2. **Input Monthly Forecasted Units**:&#x20;

   After unit rates are set, the user provides the forecasted number of units:<br>

   <figure><img src="https://3858159242-files.gitbook.io/~/files/v0/b/gitbook-x-prod.appspot.com/o/spaces%2FWqjB2puKXPDR7L86FX2e%2Fuploads%2FLYhva2Cb9C6vgHEi8F18%2Fimage.png?alt=media&#x26;token=ebd89b39-3c09-485a-920d-a8ce599a0d18" alt=""><figcaption></figcaption></figure>

   \
   **Example:**\
   You manually set the unit rate to 20 because you want a fixed, controlled rate.\
   You forecast 150 manual units for the next period.\
   The forecast is calculated by: **Forecasted cost = unit rate × unit number** = 20 × 150 = 3,000
3. Click **Next**.\
   **Result**:\
   You are brought to the **Run Rate Alerts** step.<br>

### 5. Run Rate Alerts&#x20;

The monthly run rate of a given line item projects the estimated end-of-month cost based on the past 30 days of spending.

Run rate alerts notify you when the monthly run rate for any given line item exceeds its budgeted amount, allowing you to make timely adjustments to stay on target with your financial goals. The run rate alerts are evaluated every week, four times a month: on the 4th, the 11th, the 18th, and the 25th.<br>

<figure><img src="https://3858159242-files.gitbook.io/~/files/v0/b/gitbook-x-prod.appspot.com/o/spaces%2FWqjB2puKXPDR7L86FX2e%2Fuploads%2F4fNezOKD17gMVoUJxLgX%2Fimage.png?alt=media&#x26;token=839b4406-4659-4995-81ee-9f6bca291b9a" alt=""><figcaption></figcaption></figure>

1. Enabling Run Rate Alerts is toggled on by default. **Toggle off** to disable it.
2. Enable the toggle "**Define endpoints per line item**" to send alerts to distinct endpoints for each line item.\
   A new Endpoint column appears. Choose an endpoint for each line.<br>

   <figure><img src="https://3858159242-files.gitbook.io/~/files/v0/b/gitbook-x-prod.appspot.com/o/spaces%2FWqjB2puKXPDR7L86FX2e%2Fuploads%2FbPSLdHheiD3G2z3sJolC%2Fimage.png?alt=media&#x26;token=c35eb61b-bf5a-4e45-99bb-7a8f054b619c" alt=""><figcaption></figcaption></figure>

When at least one of the selected keys in the financial plan is a Virtual Tag, you can choose which key's endpoint metadata to use. Endpoint metadata is populated automatically. To learn more about setting endpoint metadata for a virtual tag, see [Virtual Tag Metadata API](https://docs.finout.io/api/finout-api/virtual-tag-metadata-api).\ <br>

<figure><img src="https://3858159242-files.gitbook.io/~/files/v0/b/gitbook-x-prod.appspot.com/o/spaces%2FWqjB2puKXPDR7L86FX2e%2Fuploads%2FwKjdHXKB34vRfJ2dG9Uo%2Fimage.png?alt=media&#x26;token=11195a22-cc5f-440c-b501-d17758e6d1c2" alt=""><figcaption></figcaption></figure>

3. Choose a default endpoint for financial plan alerts. If not set, alerts will default to the endpoint configured in the anomalies settings.<br>

   <figure><img src="https://3858159242-files.gitbook.io/~/files/v0/b/gitbook-x-prod.appspot.com/o/spaces%2FWqjB2puKXPDR7L86FX2e%2Fuploads%2FuNLLce2heia2ucvgWic5%2Fimage.png?alt=media&#x26;token=6e33741b-a59d-446c-aba3-0e1ae35a5403" alt=""><figcaption></figcaption></figure>
4. You can choose to disable alerts to a specific value.<br>

   <div data-gb-custom-block data-tag="hint" data-style="info" class="hint hint-info"><p><strong>Note</strong>: The run rate alert configuration can be edited after creating a financial plan.</p></div>

<figure><img src="https://3858159242-files.gitbook.io/~/files/v0/b/gitbook-x-prod.appspot.com/o/spaces%2FWqjB2puKXPDR7L86FX2e%2Fuploads%2FX0wa45KyUdNVgS4X1g8q%2Fimage.png?alt=media&#x26;token=fd185fb0-2e2d-430b-83a1-557903cfd3f4" alt=""><figcaption></figcaption></figure>

{% hint style="info" %}
**Note**: Alerts are sent to configured endpoints based on user configurations and will also appear in the Anomalies Feed, where users can review and access them directly.
{% endhint %}

5. Click **Create**.\
   Your financial plan is created and appears in the Financial Plan list.

## Input Data to Financial Plans <a href="#h_da5b90eeee" id="h_da5b90eeee"></a>

After creating your financial plan, you can add budget and forecast values in the following ways:

* **Inline edit** - Manually insert the necessary data per line item.
* **Bulk upload** - Bulk upload data using a CSV.&#x20;

{% hint style="info" %}
**Note**: Only an Admin can bulk upload.
{% endhint %}

* **Edit budgets in a line item** - Editing budgets in a line item within a financial plan allows you to update and manage the financial allocations for specific entries or distribute them evenly throughout each month.

### Financial Plan Permissions <a href="#h_55e4e09a6a" id="h_55e4e09a6a"></a>

By default, only admins have access to edit financial plans. You can provide edit permissions for users and groups in the following two ways:

1. **Define group permissions by using Virtual Tag Value Metadata API**

   While all users have read permissions, you can specify who has permission to edit a particular line item within a financial plan. This can be done by determining who can edit line items in a financial plan using your account groups. To use the groups in a financial plan, you need to set group metadata on the values of the lowest virtual tag in your financial plan hierarchy.

   Once groups are defined based on the values of the lowest virtual tag, you need to sync your plan to reflect those changes. Once done, only users in the group associated with the line item can edit the line. See [Virtual Tag Metadata API](https://docs.finout.io/api/finout-api/virtual-tag-metadata-api).\
   ​\
   ​**Example**: Suppose you have two groups—Group 1 and Group 2.

   1\) *Define Groups*:\
   Enrich your virtual tag values with group metadata as follows:

   * **Data** is associated with Group 1.
   * **App** is associated with Group 2.

   2\) *Set Permissions*:

   * Only users in Group 1 or admins can edit lines associated with **Data**.
   * Only users in Group 2 or admins can edit lines associated with **App**.<br>

   <div data-gb-custom-block data-tag="hint" data-style="info" class="hint hint-info"><p><strong>Note</strong>: You can only view custom metadata added to a value of the lowest virtual tag in your hierarchy.</p></div>
2. [**ACL permissions**](https://docs.finout.io/cross-platform-features/list-of-cross-platform-features/acl-permissions):

   You can set **read** and **write** permissions as either **Public**, **Private**, and **Shared**. Permission for an object is granted if a user or group have a role with the proper permission and also ACL permission to access the object. By default, ACL read and write permissions follow the account’s default configuration.<br>

**To  change ACL permissions**:

1. Navigate to **Financial Plans**.\
   You are brought to the Financial Plans list.\
   ​

   <figure><img src="https://3858159242-files.gitbook.io/~/files/v0/b/gitbook-x-prod.appspot.com/o/spaces%2FWqjB2puKXPDR7L86FX2e%2Fuploads%2FTFTcN2qgZTWVltf7u96Q%2Fimage.png?alt=media&#x26;token=1029ff8a-235c-4ab9-98f4-7c3792f2e9ad" alt=""><figcaption></figcaption></figure>
2. Choose a financial plan.\
   You are brought to the **Financial Plan Details** tab.

   <figure><img src="https://3858159242-files.gitbook.io/~/files/v0/b/gitbook-x-prod.appspot.com/o/spaces%2FWqjB2puKXPDR7L86FX2e%2Fuploads%2FvtvZDcpzWZ0zKGuhvkfj%2Fimage.png?alt=media&#x26;token=b1db37d1-6de1-4d73-8c93-2d76ddc7a2a4" alt=""><figcaption></figcaption></figure>

   <figure><img src="https://downloads.intercomcdn.eu/i/o/20224082/a92b30eb331cbcfdf24f98de/image.png?expires=1727308800&#x26;signature=e25b922dba65294fa60c1bcc3dbfa1a7426a861ee7c49a1d8197f78fbedade12&#x26;req=0tVtx1z6pDVk2hj99dpg6kPXuSom3fJ%2FqYehiYf0vL87fq9%2FtyQOWyJTJOPV%0AsBXFdlzxLnNho%2FTULr3F81JR%0A" alt=""><figcaption></figcaption></figure>
3. Click ![](https://lh7-rt.googleusercontent.com/docsz/AD_4nXcjaOV5vVjXBIHgz_4MiaKHIIfPx7i8IUxalqokVUYN10Rvae7TIheqcH0J_dlxEqOX9mdl4BkTLPOyGS4sdwYsMHINr8Mqwiy2lHUIFyyF_31vsezZ797y-_pfFFqJRTpKMQAQKKOGzbBNNUB7RRKs-Lha?key=fjqBSIeK_DDgXRG_cRbrLA) by the financial plan name.\
   The Settings popup appears.

   <figure><img src="https://3858159242-files.gitbook.io/~/files/v0/b/gitbook-x-prod.appspot.com/o/spaces%2FWqjB2puKXPDR7L86FX2e%2Fuploads%2FVOsrjxSm2jTN6mNAuzOo%2Fimage.png?alt=media&#x26;token=0cbbecdf-2a4a-4bbb-b7ae-ba143ba5edaa" alt=""><figcaption></figcaption></figure>
4. Select one of the three modes in ACL permissions:
   * **Public:** Grants access to anyone in the organization who has Role-Based Access Control (RBAC).
   * **Private:** Restricts access to admins and the user who created the object.
   * **Shared:** Limits access to specific users or groups that have Role-Based Access Control (RBAC).&#x20;

     <div data-gb-custom-block data-tag="hint" data-style="info" class="hint hint-info"><p><strong>Note</strong>: Admins and creators always retain access.</p></div>
5. Click **Save**.\
   Your Permissions are updated.

### Edit Line Item Values <a href="#h_7a7925fa12" id="h_7a7925fa12"></a>

Inline editing lets you add budget values by manually entering the required data in your financial plan.

\
​**To enter edit mode within the financial plan:**

1. Navigate to **Financial Plans**.\
   You are brought to the Financial Plans list.

   <figure><img src="https://3858159242-files.gitbook.io/~/files/v0/b/gitbook-x-prod.appspot.com/o/spaces%2FWqjB2puKXPDR7L86FX2e%2Fuploads%2FCq1MS8vaYfq3e6Mi0vwc%2Fimage.png?alt=media&#x26;token=e0d29d97-c6e4-407b-a4c4-5525a1707f2d" alt=""><figcaption></figcaption></figure>

   <figure><img src="https://downloads.intercomcdn.eu/i/o/20208114/c05579c6d7bbebae7e4158be/image.png?expires=1727308800&#x26;signature=0d515de05f596665dfb1663f29d8ebd76cf9ee07efb571276df2c9e9131774e6&#x26;req=0tVtxVD7rTNk2hj99dpg6uqf3m3NEkP7IT6tRsD8Bx6hMuJwF4zWlPVbISnC%0AXftBP61nK9f6I7fAVcyRA8zN%0A" alt=""><figcaption></figcaption></figure>
2. Choose a financial plan.\
   You are brought to the **Financial Plan Details** tab.<br>

   <figure><img src="https://downloads.intercomcdn.eu/i/o/20235417/e1a88d014803068867cb7e0d/image.png?expires=1727181900&#x26;signature=3f4b0fd4448c341419e0b4bb03dc11e97a8475b9ea1e134d8517e145856f6094&#x26;req=0tVtxl3%2BrTBk2hL085ZhoVR8cdtJioypZlsMHVXQsQTNrDamZH1RvxhgBx7%2F%0AzQ%3D%3D%0A" alt=""><figcaption></figcaption></figure>

   <figure><img src="https://3858159242-files.gitbook.io/~/files/v0/b/gitbook-x-prod.appspot.com/o/spaces%2FWqjB2puKXPDR7L86FX2e%2Fuploads%2FUA0M8bO2TiP9Pqb5zwWA%2Fimage.png?alt=media&#x26;token=f73a64e1-73bc-433d-8fcf-90da625ac47b" alt=""><figcaption></figcaption></figure>
3. Click the rows that you want to edit.

   <figure><img src="https://downloads.intercomcdn.eu/i/o/20202932/9b27c295a60530fb9424fe95/image.png?expires=1727308800&#x26;signature=366395cca75eb1c20afdd5d98e509107be546b3bc20fd8740ad39467b8fc6594&#x26;req=0tVtxVrzrzVk2hj99dpg6tLuyplUJxN7ack%2BIMQdO4Y63cLQsnWVD9lFzbQh%0Ak5c1wXDii2E%2BjbdhVRm7qyDa%0A" alt=""><figcaption></figcaption></figure>
4. Click ![](https://lh7-us.googleusercontent.com/docsz/AD_4nXdWQn20HR3aUdpVSByBna33VH5JE07rlgiovKd0QEGxYImwCyxw5vtmKWDDgTT1iSlPp2wG3L6DlAJOkd9QatnGBozyujVxM502AH5KjrNSXSqsvTkcN5twGTzEpwUaSWjJ_-BYQ-QHcQCTsVMwddMFKGQ?key=fjqBSIeK_DDgXRG_cRbrLA).\
   Inline editing is enabled for the selected rows.

   <figure><img src="https://3858159242-files.gitbook.io/~/files/v0/b/gitbook-x-prod.appspot.com/o/spaces%2FWqjB2puKXPDR7L86FX2e%2Fuploads%2FkmgeFggQ28ZopBeIWAb4%2Fimage.png?alt=media&#x26;token=46ebb39b-a6f1-4445-8e55-8d776137a4c7" alt=""><figcaption></figcaption></figure>

   <figure><img src="https://downloads.intercomcdn.eu/i/o/20202839/b151eb83ee782d11f175e50e/image.png?expires=1727308800&#x26;signature=5b3bbbf39cc749fedf13869fece410f004215ffc31a01e7f0ea128a6f0345789&#x26;req=0tVtxVryrz5k2hj99dpg6v%2B9pSg3YTlJHE0zqXY6PxQ8LbjQ0YtMgN61x%2Fm2%0App0ygJ03uRjdFh0AbOKhT2lI%0A" alt=""><figcaption></figcaption></figure>
5. Make your changes and click **Apply**.\
   Your plan is updated.

### Bulk Upload Line Item Values <a href="#h_6ddcdcd415" id="h_6ddcdcd415"></a>

Bulk upload data by uploading a CSV to your financial plan.&#x20;

{% hint style="info" %}
**Note**: Only an Admin can bulk upload.
{% endhint %}

**To bulk upload data to your financial plan**:

1. Navigate to **Financial Plans**.\
   You are brought to the Financial Plans list.

   <figure><img src="https://3858159242-files.gitbook.io/~/files/v0/b/gitbook-x-prod.appspot.com/o/spaces%2FWqjB2puKXPDR7L86FX2e%2Fuploads%2F8zLFn5G7MjIWepZQvvpo%2Fimage.png?alt=media&#x26;token=370b0a44-c79c-40c9-a68b-2e76fc87a951" alt=""><figcaption></figcaption></figure>

   <figure><img src="https://downloads.intercomcdn.eu/i/o/20208114/c05579c6d7bbebae7e4158be/image.png?expires=1727308800&#x26;signature=0d515de05f596665dfb1663f29d8ebd76cf9ee07efb571276df2c9e9131774e6&#x26;req=0tVtxVD7rTNk2hj99dpg6uqf3m3NEkP7IT6tRsD8Bx6hMuJwF4zWlPVbISnC%0AXftBP61nK9f6I7fAVcyRA8zN%0A" alt=""><figcaption></figcaption></figure>

2. Choose a financial plan.\
   You are brought to the **Financial Plan Details** tab.<br>

   <figure><img src="https://downloads.intercomcdn.eu/i/o/20229723/4e28850270af1946df7d93c2/image.png?expires=1727308800&#x26;signature=6ca712c59bed5fd4e132923c1d0acbace24adb64887e21fb91bfe568f2794f18&#x26;req=0tVtx1H9rjRk2hj99dpg6gE7xtHi7F3c0LjxXWuFNSOAR05YP2smBM2vAsWj%0AKAatrgQx6pt9Um2yBQZYm2G5%0A" alt=""><figcaption></figcaption></figure>

   <figure><img src="https://3858159242-files.gitbook.io/~/files/v0/b/gitbook-x-prod.appspot.com/o/spaces%2FWqjB2puKXPDR7L86FX2e%2Fuploads%2FSavfUdbrui8yOVbZ7iYG%2Fimage.png?alt=media&#x26;token=a8966e1f-c6d7-40e2-bab0-c772516357da" alt=""><figcaption></figcaption></figure>

3. Click <img src="https://lh7-us.googleusercontent.com/docsz/AD_4nXdK6flAeBugOLHcmtmUZ1gLlpRrVR-NoEI1O0FwPp5eRe9khalEIhH2F9dCQhHqTPyCh_qqbYXNkx_GyLUl83CaWGwkIwr5b9lEza_a5eY1vwu4D_tWzQ7SOzmgV67xciTo8DbqobjATWeXiOoPVFszwEF9?key=fjqBSIeK_DDgXRG_cRbrLA" alt="" data-size="line">to download the view as a CSV file.\
   A CSV of the financial plan is downloaded to your computer.

   <div data-gb-custom-block data-tag="hint" data-style="info" class="hint hint-info"><p><strong>Note</strong>: The download will only show what is in the current view. You can filter the view to customize the downloaded CSV file.</p></div>

4. Enter the budget and forecast values in the downloaded CSV file.

   <div data-gb-custom-block data-tag="hint" data-style="warning" class="hint hint-warning"><p><strong>Important</strong>:<br>- Financial plans support up to 1000 line items.<br>- Ensure your data matches the downloaded CSV template.<br>- Use full numerical values (Ex: 10,000, not 10K).<br>- In the type column, indicate if the line is custom or not.<br>- In the Status column, indicate whether the line item is ignored or included.<br>- If you want to add a custom line, make sure to mark it as custom in the <em>type</em> column.</p></div>

5. Import the CSV file to Finout by clicking **Import CSV File**.\
   The **Import CSV File** window appears.

   <div align="left"><figure><img src="https://3858159242-files.gitbook.io/~/files/v0/b/gitbook-x-prod.appspot.com/o/spaces%2FWqjB2puKXPDR7L86FX2e%2Fuploads%2Fus4Y2H9RkIufyCdWnNnp%2Fimage.png?alt=media&#x26;token=289bfce0-efa1-43a7-a55c-5c9f29879e8c" alt=""><figcaption></figcaption></figure></div>

   <div align="left"><figure><img src="https://finout.intercom-attachments.eu/i/o/15120893/f983c721436e2a472d959ac3/AD_4nXfzIPlVH2zvHDxXeeMmdGzjOnipZkUOdts-4_Qk2TmhOCHGxZ8wHVSJWfLlSqu0XR_jHIb8azr2ACa_DBIu7LU9C8rWEAUoACHH08okJEG90jByh3uvNea741FWXh2ZAvVCihFsJn6e33p9Sn6jL4TUirkv?expires=1727308800&#x26;signature=85fc1a33720ecd5235d42fda76b6810415692dd6f9f45a4a1db4133e34d00a5e&#x26;req=0dBux1jypTRk2hj99dpg6g2w6N0bhIwzyB4SV8%2FerI%2FI5ySxBkTt1doQv34R%0A1HalgK9HXmfPNQ%2FjwtwUTypm%0A" alt="" width="563"><figcaption></figcaption></figure></div>

6. Upload the CSV file.

   <div data-gb-custom-block data-tag="hint" data-style="info" class="hint hint-info"><p><strong>Note</strong>: The values uploaded in the CSV file will override any existing budgets and forecast values. Cost and delta values are not updated.</p></div>

7. Click **Update**.\
   The data from the CSV has been updated in your financial plan.

### CSV Import Errors and Solutions <a href="#h_e8fe983ec8" id="h_e8fe983ec8"></a>

Various errors can prevent a successful upload of CSV files to financial plans. The following table describes common CSV import errors and solutions to resolve them. By understanding these error messages and their solutions, you can troubleshoot any issue and ensure a smoother import process.

<table data-header-hidden><thead><tr><th width="446"></th><th></th></tr></thead><tbody><tr><td><strong>Upload Error Reason</strong></td><td><strong>Error Solution</strong></td></tr><tr><td>Some cells in your file that are supposed to contain numerical values for budgets or forecasts have text instead.</td><td>Ensure that all these cells have only numbers.</td></tr><tr><td>The column headers in your uploaded file do not match the headers in the Financial Plan.</td><td>Check and ensure that the headers are identical.</td></tr><tr><td>The months provided in your file are not within the range specified in the financial plan.</td><td>Adjust the months to fall within the correct range.</td></tr><tr><td>Some numbers in your file are not in full numerical format.</td><td>Ensure that all numbers are fully displayed and formatted correctly.</td></tr><tr><td>A custom line item you are trying to upload already exists in the Financial Plan.</td><td>Remove or rename the duplicate item.</td></tr><tr><td>A line item appears more than once in your CSV file.</td><td>A line item appears more than once in your CSV file. Ensure that all line items are unique.</td></tr><tr><td>A month is listed more than once in your CSV file.</td><td>Each month should be unique and only appear once.</td></tr><tr><td>A custom line item is not marked as "Custom" in the Type column.</td><td>Ensure that custom items are correctly labeled in the Type column.</td></tr><tr><td>Some line items in the Type column are not specified as default or custom.</td><td>All line items in the Type column must be either default or custom. Correct the Type column to include only these two options.</td></tr><tr><td>Your uploaded file is empty or lacks the necessary data.</td><td>Ensure that the file contains the required information.</td></tr><tr><td>The file you are trying to upload is too large.</td><td>Reduce the file size to within the 2MB limit.</td></tr><tr><td>You are trying to upload multiple files simultaneously.</td><td>Only one file can be uploaded at a time.</td></tr><tr><td>The file type you are trying to upload is not allowed.</td><td>Ensure that the file type is in CSV format.</td></tr><tr><td>File reading has failed.</td><td>Try uploading the file again.</td></tr><tr><td>An unknown error has occurred.</td><td>Try uploading the file again.</td></tr><tr><td>All the line items in your uploaded file are custom.</td><td>Change the format of the key cells in the Excel file to a string instead of a number.</td></tr><tr><td>Adding new custom line items would exceed the maximum limit of 1,000 line items per plan, preventing the upload.</td><td>Ensure that your financial plan does not exceed the 1000 line items limit.</td></tr></tbody></table>

### Edit Budgets in a Line Item <a href="#h_b2d2368ced" id="h_b2d2368ced"></a>

Editing budgets in a line item within a financial plan allows you to update and manage the financial allocations for specific entries or distribute them evenly throughout each month. This ensures that your plan remains accurate and up-to-date.

{% hint style="info" %}
**Note**: Updated budgets will override existing budget values.
{% endhint %}

**A budget can be split in two ways:**

*Split Manually* - Manually enter the monthly budget.

*Split Evenly* - The budget amount of the whole line item will be divided equally across the financial plan period.\
​

<figure><img src="https://downloads.intercomcdn.eu/i/o/19724134/5616f6d7dde869f130c76d21/editlineitems-ezgif_com-speed.gif?expires=1727308800&#x26;signature=236c34b4b7be5f0128dabbfad10040769678733336f56112f133c3c00d55bdaa&#x26;req=0dxox1z7rzNk2hj99dpg6oIv5slhv6454t8pIklVSMx97qshGWzzSNd7R%2FWd%0AnJ2c4tOpj0JvVd%2FjRFKsL%2BcB%0A" alt=""><figcaption></figcaption></figure>

**To manually split budgets in a line item**:

1. Navigate to **Financial Plans**.\
   You are brought to the Financial Plans list.

   <figure><img src="https://3858159242-files.gitbook.io/~/files/v0/b/gitbook-x-prod.appspot.com/o/spaces%2FWqjB2puKXPDR7L86FX2e%2Fuploads%2FbUUHPwmPimEV5U0jpHCn%2Fimage.png?alt=media&#x26;token=571d71af-e200-4ada-a0a9-dfb52cc6479a" alt=""><figcaption></figcaption></figure>

   <figure><img src="https://downloads.intercomcdn.eu/i/o/20208114/c05579c6d7bbebae7e4158be/image.png?expires=1727308800&#x26;signature=0d515de05f596665dfb1663f29d8ebd76cf9ee07efb571276df2c9e9131774e6&#x26;req=0tVtxVD7rTNk2hj99dpg6uqf3m3NEkP7IT6tRsD8Bx6hMuJwF4zWlPVbISnC%0AXftBP61nK9f6I7fAVcyRA8zN%0A" alt=""><figcaption></figcaption></figure>
2. Choose a financial plan.\
   You are brought to the **Financial Plan Details** tab.

   <figure><img src="https://3858159242-files.gitbook.io/~/files/v0/b/gitbook-x-prod.appspot.com/o/spaces%2FWqjB2puKXPDR7L86FX2e%2Fuploads%2FkQ9CYTqPRkcQHKV7Swtp%2Fimage.png?alt=media&#x26;token=814b296d-75d9-4191-8ab1-8d565259ee7b" alt=""><figcaption></figcaption></figure>

   <figure><img src="https://downloads.intercomcdn.eu/i/o/20229919/f05898098e486044b113c614/image.png?expires=1727308800&#x26;signature=24d7642a3d0566e1fcb8a1694d147a43541d54cbed7e028f43412d559d6974b0&#x26;req=0tVtx1HzrT5k2hj99dpg6g6mlzP40KBcb1a66QruMPSV5PH%2FA5tQMnR9cCRi%0ADyk42BQ2jz9zp1oqsuaMwBp9%0A" alt=""><figcaption></figcaption></figure>
3. Click![](https://lh7-rt.googleusercontent.com/docsz/AD_4nXesDC0kyiDXzQQsOEKxigsOcMGAGhej0rzyE39FAtoWnM_fATqBHcITivje_VoYhAPjII_IahW-07-PzS0qe6mNvVk5IzTAMWbkCVo3WPZMWil6dM9MhF4Wt8cfe2HliJi0FbnxRBHVDvlpRdONvRpCpaUQ?key=fjqBSIeK_DDgXRG_cRbrLA)for the line item whose budget you want to edit and click **Edit Line’s Budget**.\
   The **Edit Line’s Budgets** popup appears.

   <div align="left"><figure><img src="https://3858159242-files.gitbook.io/~/files/v0/b/gitbook-x-prod.appspot.com/o/spaces%2FWqjB2puKXPDR7L86FX2e%2Fuploads%2FTrCI0HurZUVAQFS0IC8i%2Fimage.png?alt=media&#x26;token=bc64eb3b-c7a2-4635-b3d4-fe61c04fc0e7" alt=""><figcaption></figcaption></figure></div>

   <figure><img src="https://finout.intercom-attachments.eu/i/o/18128895/fd8bef4c155a25ad9a748d85/AD_4nXdZR4JGGS_cm0ipoz-zqOHgzvNBldjiobmS-cu2elo-RdIrmgTsQolraKOYarbIzy8uQcIC3DPAa8lJSd96MBYcPi6s1nKFZ_AMo2Ngj5QhXKL_wG_D1XdH96AZY4epxjXJwMd5YZzGhyoRMvzEpOIHb_QW?expires=1727308800&#x26;signature=1879e06668b94c3841d886b3160396217c81009efcf8e06b67c2dacac7c115e4&#x26;req=0d1ux1DypTJk2hj99dpg6mwKMlUt7g4OS1OTLfE%2BAooAGSy09CwJOWNKLrSi%0A%2BwTj%2BZxnHtjPhHq7gsJSa%2Fcf%0A" alt=""><figcaption></figcaption></figure>
4. Under the **Updated Budget** column, enter your updated budget values.
5. Click **Save**.\
   The **Confirm updates** popup appears.

   <div data-gb-custom-block data-tag="hint" data-style="info" class="hint hint-info"><p><strong>Note</strong>: Updated budgets will override existing budget values.</p></div>

   <div align="left"><figure><img src="https://3858159242-files.gitbook.io/~/files/v0/b/gitbook-x-prod.appspot.com/o/spaces%2FWqjB2puKXPDR7L86FX2e%2Fuploads%2FIDtGJgCevO1cjQTy4jOS%2Fimage.png?alt=media&#x26;token=f8745fa1-fd1d-483e-b42f-556d3e9f4ac1" alt=""><figcaption></figcaption></figure></div>

   <div align="left"><figure><img src="https://finout.intercom-attachments.eu/i/o/18128896/ebfcf82de50dfc823b2ecea3/AD_4nXd0uqjk9dzjCWvKhDvE8hzHrKwcQWECmaSe7XquPpfnS6Dkyfxbq35TVKBCV7APhnFixL3Zs4_stOVpJLhFlWClu7a403DnvdiTAzSY2RkgrKh0cA6I6GNrrrUFVlbGayfaGVHqxIbvOm2gnzj1iaj6HzOj?expires=1727308800&#x26;signature=bee25b56065935c7a7759f9e8de480bdea35d5dc0363ac7b29ce41c648e0bd96&#x26;req=0d1ux1DypTFk2hj99dpg6rZBte2AdqFdUadaqOebHZVRN8RdeK3g2yl3UZwt%0ALRA%2F21iFHiHDywXbmXr%2Frfsy%0A" alt=""><figcaption></figcaption></figure></div>
6. Click **Apply**.\
   ​Your new budgets are updated.

**To evenly split budgets in a line item**:

1. Navigate to **Financial Plans**.\
   You are brought to the Financial Plans list.<br>

   <figure><img src="https://downloads.intercomcdn.eu/i/o/20208114/c05579c6d7bbebae7e4158be/image.png?expires=1727308800&#x26;signature=0d515de05f596665dfb1663f29d8ebd76cf9ee07efb571276df2c9e9131774e6&#x26;req=0tVtxVD7rTNk2hj99dpg6uqf3m3NEkP7IT6tRsD8Bx6hMuJwF4zWlPVbISnC%0AXftBP61nK9f6I7fAVcyRA8zN%0A" alt=""><figcaption></figcaption></figure>

   <figure><img src="https://3858159242-files.gitbook.io/~/files/v0/b/gitbook-x-prod.appspot.com/o/spaces%2FWqjB2puKXPDR7L86FX2e%2Fuploads%2FvnNQoMyyht1wEHhVjayA%2Fimage.png?alt=media&#x26;token=7cd19e3b-f480-48a8-bde3-e953880241c0" alt=""><figcaption></figcaption></figure>
2. Choose a financial plan.\
   You are brought to the **Financial Plan Details** tab.

   <figure><img src="https://3858159242-files.gitbook.io/~/files/v0/b/gitbook-x-prod.appspot.com/o/spaces%2FWqjB2puKXPDR7L86FX2e%2Fuploads%2F2aTBG1mvaYQy3J2rYAix%2Fimage.png?alt=media&#x26;token=31e56cdc-722d-43b0-9362-9e5aa1da7c16" alt=""><figcaption></figcaption></figure>

   <figure><img src="https://downloads.intercomcdn.eu/i/o/20222980/dd9e4379d68755dec125cf47/image.png?expires=1727308800&#x26;signature=c8eafe1a19c4461398451ea365e6968170ee2ca25d5a9377f8ad35d294fec2f0&#x26;req=0tVtx1rzpDdk2hj99dpg6synl0dNowPQ5fHhQEIMs10B4nKZi4BFsvaVQhhs%0A5STHxOMhvFjTFmeCSKqwIfjU%0A" alt=""><figcaption></figcaption></figure>
3. Click![](https://lh7-rt.googleusercontent.com/docsz/AD_4nXesDC0kyiDXzQQsOEKxigsOcMGAGhej0rzyE39FAtoWnM_fATqBHcITivje_VoYhAPjII_IahW-07-PzS0qe6mNvVk5IzTAMWbkCVo3WPZMWil6dM9MhF4Wt8cfe2HliJi0FbnxRBHVDvlpRdONvRpCpaUQ?key=fjqBSIeK_DDgXRG_cRbrLA)for the line item whose budget you want to edit and click **Edit Line’s Budget.**\
   The **Edit Line’s Budgets** popup appears.

   <div align="left"><figure><img src="https://3858159242-files.gitbook.io/~/files/v0/b/gitbook-x-prod.appspot.com/o/spaces%2FWqjB2puKXPDR7L86FX2e%2Fuploads%2FDyDe2u5otyicnA2CPqyu%2Fimage.png?alt=media&#x26;token=2107fb5f-31a6-4baf-a67b-c66773b93015" alt=""><figcaption></figcaption></figure></div>

   <figure><img src="https://finout.intercom-attachments.eu/i/o/18128898/5d9f107e444c912c5c9db2f9/AD_4nXdZR4JGGS_cm0ipoz-zqOHgzvNBldjiobmS-cu2elo-RdIrmgTsQolraKOYarbIzy8uQcIC3DPAa8lJSd96MBYcPi6s1nKFZ_AMo2Ngj5QhXKL_wG_D1XdH96AZY4epxjXJwMd5YZzGhyoRMvzEpOIHb_QW?expires=1727308800&#x26;signature=3c59590a7658d11f055e4cef6c4efc1f66153dfd5f2eb0c599ef0ba43cfcf8c3&#x26;req=0d1ux1DypT9k2hj99dpg6nq3yZczwrdocahrKo%2BTYNdJ4m%2BPk4wuhRan62Um%0AV9erkCOGLV4Ey1BLBwxgVLZb%0A" alt=""><figcaption></figcaption></figure>
4. Click the **Spilt Evenly** tab.

   <div align="left"><figure><img src="https://3858159242-files.gitbook.io/~/files/v0/b/gitbook-x-prod.appspot.com/o/spaces%2FWqjB2puKXPDR7L86FX2e%2Fuploads%2FoRkhnbGPoVaJPJkbcvsI%2Fimage.png?alt=media&#x26;token=090f9444-17b8-46e2-bd9a-b3360516d296" alt=""><figcaption></figcaption></figure></div>

   <figure><img src="https://finout.intercom-attachments.eu/i/o/18128901/86d2565680c9ce5df17286d3/AD_4nXfCXR-1Cg8it8HLPKDwIcOy3f6l1f6fa-wZL2pdgED4G8Tc6PwpI3HryEjqTlLfPSiJVvgh8lgyVricOlwIjo8JUcRSGO5BSnckCRl9vF7R0hg2xxV9mwQ9-bXxPyxExoFSbdgj309XDiuHi0sA5dgKhTA?expires=1727308800&#x26;signature=d0f6b2443ae4f18833abdd5abf536fd9abe6a2726fb9b96a7e24a09774da6210&#x26;req=0d1ux1DzrDZk2hj99dpg6vVaWjEv1bkB8m5vy%2BBeLRoKBeQS64x86mF7fwx0%0AoGrAXnqQdyFD1q3V1a4LgY7I%0A" alt=""><figcaption></figcaption></figure>
5. In **Total Budget**, enter the total budget for the line you want to be evenly divided across each month.
6. Optionally press **Calculate** to see the budget amounts in the **Updated Budget** column.
7. Click **Save**.\
   The **Confirm updates** popup appears.

   <div data-gb-custom-block data-tag="hint" data-style="info" class="hint hint-info"><p><strong>Note</strong>: Updated budgets will override existing budget values.</p></div>

   <div align="left"><figure><img src="https://3858159242-files.gitbook.io/~/files/v0/b/gitbook-x-prod.appspot.com/o/spaces%2FWqjB2puKXPDR7L86FX2e%2Fuploads%2FmCWhXEoyIGGuBrnp1v5l%2Fimage.png?alt=media&#x26;token=51d1031a-c54f-4715-8647-684c86dd4e68" alt=""><figcaption></figcaption></figure></div>

   <div align="left"><figure><img src="https://finout.intercom-attachments.eu/i/o/18128904/171835c1e47d20183033ff86/AD_4nXd0uqjk9dzjCWvKhDvE8hzHrKwcQWECmaSe7XquPpfnS6Dkyfxbq35TVKBCV7APhnFixL3Zs4_stOVpJLhFlWClu7a403DnvdiTAzSY2RkgrKh0cA6I6GNrrrUFVlbGayfaGVHqxIbvOm2gnzj1iaj6HzOj?expires=1727308800&#x26;signature=2e6318cdfb426a4c51bf9081b3d8fa35026a72b350494f0a712e0788e922d16c&#x26;req=0d1ux1DzrDNk2hj99dpg6mBuaydWSrU3bKO9AYW1qE0Ca%2BcqXZuVwPqxnODo%0AO17xkrv4LaTyJdSSoGYAFdFR%0A" alt=""><figcaption></figcaption></figure></div>
8. Click **Apply**.\
   ​Your new budgets are updated.

## Manage Financial Plans <a href="#h_95e1938f42" id="h_95e1938f42"></a>

Managing your financial plan in a streamlined and efficient way by using three key tabs. Utilize these tabs to effectively manage your financial plan and ensure that it is accurate, comprehensive, and aligned with your financial goals.

* [Financial Plan Details](#h_57ab60415a): This is where you manage the budgets and forecasts for your financial plan. You can apply various filters to focus on particular data sets, add custom line items to account for unique or anticipated future expenses, and sync your financial data to ensure all data is up-to-date. This level of detail ensures that your financial plan is comprehensive and tailored to your specific needs.
* [Dashboard](#h_e0181fe78e): The dashboard provides a visual representation of your financial plan through widgets that display actual costs and budgets. This view allows you to quickly assess your financial status at a glance, identify any discrepancies between planned and actual expenditures, and make informed decisions based on real-time data. The visual nature of the dashboard makes it easier to understand complex financial information and track your progress.
* [Plan Completion Rate](#h_00029f968c): This view helps you track the percentage of line items with budget values in your financial plans. By monitoring the completion rate, you can ensure that all necessary items are accounted for and budgeted. This view is essential for maintaining the accuracy and completeness of your financial plan, as it highlights any areas that may need attention or adjustments.

### Financial Plan Details <a href="#h_57ab60415a" id="h_57ab60415a"></a>

Financial plan details enable you to dive into the specifics of your financial plan. You can apply various filters to focus on particular data sets, add custom line items to account for unique or anticipated future expenses, and sync your financial data to ensure everything is up-to-date. This level of detail ensures that your financial plan is comprehensive and tailored to your specific needs.<br>

Each month in the financial plan details tab consists of the following five columns:

**Budget**: Represents the financial allocation for a specific month for each line item. It outlines the financial targets set for the selected month, which helps guide financial planning and budgeting.

**Forecast**: The [Finout forecasting algorithm](#h_849ac68586) leverages historical data to predict future budgets in your financial plan.

**Actual Cost**: Reflects the total expenditures accumulated over month and for the applied filters, providing a real-time view of how much has been spent during the specified timeframe.

**Run Rate**: Projects the estimated end-of-month cost based on the past 30 days of spending. It allows users to monitor whether their projected spend for the month will exceed or stay within budget, providing actionable insights to adjust usage or allocations and ensure better financial management throughout the month.

*How the Calculation Works:*

\- The total cost from the past 30 days is used to estimate the spending trend.

\- This trend is then projected forward for the remaining days in the current month, estimating the total expected spend by month-end.

<figure><img src="https://downloads.intercomcdn.eu/i/o/22134861/d4e6c0f813a9c0e87b2eb98c/AD_4nXcb2StV8d12xrTkzZVQYsiBvdrj_weIog_I3v9xDmXr5stmj4d8owzgGBB6Qr_ERFhLFLP10Wl-bnrAcTxkueSq8K-Iqhg7SYnSlzDuH1sOsdHZhPndvkBarjccbNdBR1vHfw2cDpib3FcfkzOh9-MivU0?expires=1728973800&#x26;signature=c9029adccba8a255a1b26f7071ced7f7ea3b9f624a29133d9be788ea06ca1e45&#x26;req=0tduxlzyqjZk2hL085ZhoRgWXR9BATmeJVLGWWsh5DykXzZWO%2FaL35Jwt983%0AQ4M3fkqhjPKUvFrc%0A" alt=""><figcaption></figcaption></figure>

\- Once a month ends, the run rate shows the actual end-of-month spend.\
\
​Example: \
Suppose a company's total spend for the past 30 days is $45,000. If today is the 20th day of a month with 31 days, then there are 11 days remaining. The total spend for this month is $43,500.

1. *Calculate Daily Average Spend*: $45,000/30=$1,500
2. *Estimate Spend for the Remaining Days of the Month*: $1,500×11=$16,500
3. *Calculate Total Projected Spend by Month-End*: $43,500+$16,500=$60,000

According to the run rate, the estimated end-of-month spend will be $60,000. This projection helps you monitor whether you are on track to stay within the budget or if adjustments are needed.\
​

**Delta**: Indicates a customized delta between two selected metrics—such as Budget and Run Rate—for the current month and applied filters. By defining how the delta is calculated, teams can align financial tracking with their planning needs and quickly spot whether spend is expected to exceed or stay within budget. Available metrics include: Actual Cost, Forecast, Run Rate, and Budget.

<figure><img src="https://3858159242-files.gitbook.io/~/files/v0/b/gitbook-x-prod.appspot.com/o/spaces%2FWqjB2puKXPDR7L86FX2e%2Fuploads%2FAJsE4vXROH3DMkCggXdE%2Fimage.png?alt=media&#x26;token=7dc6ccf2-9bfd-4dc1-a9fd-1b6261d173b9" alt=""><figcaption></figcaption></figure>

1. **Search Bar** - Free search using keywords to find specific information.
2. **Time frame** - Filter for specific months, quarters, halves, or years.
3. **Key Filters** - Filter keys that you chose in the configuration process.\
   ​\
   Keys operate based on cascade filtering and ensure that filters are progressively refined according to the hierarchy established during configuration.\
   When filtering for a specific department, users will only see the relevant groups in the filters. Selecting a department will show only the applicable group names.\
   ​\
   ​**Example**:\
   Imagine the financial plan hierarchy is structured as follows:

   1. Department\
      TLV

      NYC
   2. Group Names

   If you filter by a specific **Department**, you will only see the groups within that department (TLV and NYC).\
   If you select TLV, you will only see the following group names in the filter:

   * **TLV Department**
     * Data
     * Core

   This hierarchical approach simplifies filtering data by ensuring that each step is more focused and manageable.
4. **Settings** - View and edit your financial plan configurations. See [Edit Financial Plan Settings](#edit-financial-plan-settings).
5. **Share link** - Share a link of the financial plan.
6. **Aggregate By** - You can aggregate the data by keys you chose in the configuration process.
7. **Export** - Download a CSV file of the current view.
8. **Import** - Import Data to your financial plans. See [Input Data to Financial Plans](#h_da5b90eeee).
9. **Add a Custom Line Item** - Custom line items let you add rows not included in the automatic setup based on your chosen keys. This allows you to anticipate future relevance and budget for these items as part of your financial plan. See [Input Custom Line Items](#h_da5b90eeee).

   <div data-gb-custom-block data-tag="hint" data-style="info" class="hint hint-info"><p><strong>Note</strong>: Custom line items cannot be added if the plan has reached the 1,000 line limit.</p></div>
10. **Duplicate Plan** - Duplicate your financial plan with all its settings and configurations and use it as a basis for making a new customized plan. If a sync is required, you can update the plan by duplicating it. See [Duplicate your Financial Plan](#duplicate-your-financial-plan).
11. **Columns Management** - Choose which columns to show or hide.
12. **Show Deltas** - Choose to show or hide Delta columns.
13. **Show Actual Costs**- Choose to show or hide Actual Cost columns.
14. **Show Forecasts**- Choose to show or hide Forecast columns.
15. **Show Run Rates** - Choose to show or hide the run rate column.
16. **Show Only Lines with Missing Budgets** - Filter for missing budgets only.
17. **Show Only Custom Lines** - Filter for customs lines only.
18. **Show Ignored Line Items** - Ignore individual or multiple line items to ensure they are not part of your plan.
19. **Edit Budgets in a Line Item** - Editing budgets in a line item within a financial plan allows you to update and manage the financial allocations for specific entries or distribute them evenly throughout each month. See [Edit Budgets in a Line Item](#h_b2d2368ced).
20. **Ignore Line Items** - Ignore individual or multiple line items to ensure they are not part of your plan. See [Ignore Line Items](#ignore-line-items).
21. **Comment on a Line Item** - Commenting on a line item lets you add notes, feedback, or explanations directly to individual budget entries within a financial plan. See [Comment on a Line Item](#comment-on-a-line-item).

### **Custom Line Items**

#### **Input Custom Line Items**

Custom line items allow you to add rows not included in the automatic setup based on your chosen keys. You may add a custom line if you anticipate its relevance in the future and want to budget for it as part of your financial plan.

**To add custom line items**:

1. Navigate to **Financial Plans**.\
   You are brought to the Financial Plans list.

   <figure><img src="https://3858159242-files.gitbook.io/~/files/v0/b/gitbook-x-prod.appspot.com/o/spaces%2FWqjB2puKXPDR7L86FX2e%2Fuploads%2FEUQ2fa3FHEkNFnuTS1ZD%2Fimage.png?alt=media&#x26;token=c1901f4b-1887-4611-bb05-53c79e5bea52" alt=""><figcaption></figcaption></figure>

   <figure><img src="https://downloads.intercomcdn.eu/i/o/20208114/c05579c6d7bbebae7e4158be/image.png?expires=1727308800&#x26;signature=0d515de05f596665dfb1663f29d8ebd76cf9ee07efb571276df2c9e9131774e6&#x26;req=0tVtxVD7rTNk2hj99dpg6uqf3m3NEkP7IT6tRsD8Bx6hMuJwF4zWlPVbISnC%0AXftBP61nK9f6I7fAVcyRA8zN%0A" alt=""><figcaption></figcaption></figure>
2. Choose a financial plan.\
   You are brought to the **Financial Plan Details** tab.<br>

   <figure><img src="https://downloads.intercomcdn.eu/i/o/20221172/0e25390079acf0a67f15d173/image.png?expires=1727308800&#x26;signature=be6ca00640c88bdd72268461aaa1c58945eb79083a58fe30f7c1f5c909145e0e&#x26;req=0tVtx1n7qzVk2hj99dpg6m1hLjrV6yYNQMFk13VD9egiaKr%2Bl29M4mjd7Koc%0AmcafU6n%2FvBMoBXI%2FskJITzda%0A" alt=""><figcaption></figcaption></figure>

   <figure><img src="https://3858159242-files.gitbook.io/~/files/v0/b/gitbook-x-prod.appspot.com/o/spaces%2FWqjB2puKXPDR7L86FX2e%2Fuploads%2FD8WksYR1O91qAvBhRCDo%2Fimage.png?alt=media&#x26;token=f471d19f-cfdb-41a4-86c2-8884218eb0fe" alt=""><figcaption></figcaption></figure>
3. In your financial plan click ![](https://lh7-us.googleusercontent.com/docsz/AD_4nXf_5emtE1rfZHBdCGzAPUC9ksu__cZkhl3P3XesNV6buOj3c0lrWWqXHJ04TS2jGODrcHni5sXeQn8flB8K8EIigJJPpR-bWpIbRobACSBftmruLXzipKbF-Ah8gpVv4afY2yhTsmjKOur7u84KrNyeqjNu?key=fjqBSIeK_DDgXRG_cRbrLA) and then click **Add Custom Line Item**.\
   The **Add Custom Line Item** window appears. <br>

   <div data-gb-custom-block data-tag="hint" data-style="info" class="hint hint-info"><p><strong>Note</strong>: Financial plans support up to 1000 line items. You cannot add custom line items if you have already reached this limit.</p></div>

   <figure><img src="https://finout.intercom-attachments.eu/i/o/15120897/c46476b31327e1e4ec70c082/AD_4nXcY8eoEsFYGxrTMFf0yGEAV64YvMnZZhtBCea2IFDp0GUeI6HU6U3ZdND27kWIo3wZi0sJW50_8zOO5HDkb_bscOLrLgT7majLAu6momQuL4cQ4w2exerRRyOop4td3r_vNvISjr1auAEsDvDgCUJtFH1yk?expires=1727308800&#x26;signature=e1df225c7f2361635621d24aff6e1ed1318d1f8fe6b5d74f11b5d24262945765&#x26;req=0dBux1jypTBk2hj99dpg6srsLUanwvsobx1vSOOFHB%2B62LMjguEh18ikEBU6%0AHWMGZGcMAdAbDwlqMrw%2BhYUn%0A" alt=""><figcaption></figcaption></figure>

   <div align="left"><figure><img src="https://3858159242-files.gitbook.io/~/files/v0/b/gitbook-x-prod.appspot.com/o/spaces%2FWqjB2puKXPDR7L86FX2e%2Fuploads%2FmD0mLsxIwcaxUz18z5Pd%2Fimage.png?alt=media&#x26;token=c1293319-4fe1-494a-8ee0-3e3340fbed61" alt=""><figcaption></figcaption></figure></div>
4. Select values for the keys or add your own values, then click **Add Line Item**.

   <div data-gb-custom-block data-tag="hint" data-style="info" class="hint hint-info"><p><strong>Note</strong>: When adding your own values, you can choose to add values to one or all of the keys.</p></div>

   The line item appears in the financial plan list with an ![](https://lh7-us.googleusercontent.com/docsz/AD_4nXePV41TFGYSEQTH2Dtb7RoNFABLChpTr4RoL9cypn22Gq-_GhfcVNmirrja8W1420IyZz0usoPkHh5WbUCeMmiMYAIa0CKHN6B3fZliyx5YSxwgakhEE46AKvi3TyMFiUjENeKs1Qt2YA60p51Qd7FGEL6j?key=fjqBSIeK_DDgXRG_cRbrLA)indicator.

   <figure><img src="https://downloads.intercomcdn.eu/i/o/15120786/4f3d51d18c32814d32f8284e/Screenshot+2024-06-19+at+15_13_07.png?expires=1727308800&#x26;signature=2069778e3f7e68d7fd0506fccc7e2067cbc0834b1e0befa660d6f0d0f832ab19&#x26;req=0dBux1j9pDFk2hj99dpg6v9rraq8bi%2Bx4JXwVcVPCIGtoNkufD4XpY%2BIXRvD%0ArFSgT5mLpQ2IKljOaVHjOk0N%0A" alt=""><figcaption></figcaption></figure>

**To show only custom line items**:

1. Navigate to **Financial Plans**.\
   You are brought to the Financial Plans list.

   <figure><img src="https://3858159242-files.gitbook.io/~/files/v0/b/gitbook-x-prod.appspot.com/o/spaces%2FWqjB2puKXPDR7L86FX2e%2Fuploads%2FRzjvekvCykErLR6aKwHU%2Fimage.png?alt=media&#x26;token=d02235d2-5a89-4686-ad5e-6a3563f24edb" alt=""><figcaption></figcaption></figure>

   <figure><img src="https://downloads.intercomcdn.eu/i/o/20208114/c05579c6d7bbebae7e4158be/image.png?expires=1727308800&#x26;signature=0d515de05f596665dfb1663f29d8ebd76cf9ee07efb571276df2c9e9131774e6&#x26;req=0tVtxVD7rTNk2hj99dpg6uqf3m3NEkP7IT6tRsD8Bx6hMuJwF4zWlPVbISnC%0AXftBP61nK9f6I7fAVcyRA8zN%0A" alt=""><figcaption></figcaption></figure>
2. Choose a financial plan.\
   You are brought to the **Financial Plan Details** tab.

   <figure><img src="https://3858159242-files.gitbook.io/~/files/v0/b/gitbook-x-prod.appspot.com/o/spaces%2FWqjB2puKXPDR7L86FX2e%2Fuploads%2FKUlbHW3YWVOqd96hG4by%2Fimage.png?alt=media&#x26;token=c457db11-79fd-4890-8fe1-86483fa82b1e" alt=""><figcaption></figcaption></figure>

   <figure><img src="https://downloads.intercomcdn.eu/i/o/20220853/81408e37fa5bf800692d9ccd/image.png?expires=1727308800&#x26;signature=ebb4555a059c04b873af57e26101c15ba63de607aae5ae0ba21ac85fffef4705&#x26;req=0tVtx1jyqTRk2hj99dpg6qKUB6sP6GdP8fLj23r%2FZY0fBwE%2FxKW2GWiuhJ4g%0Aztnejh8QxMCxca5ldH3cObnf%0A" alt=""><figcaption></figcaption></figure>
3. In your Financial Plan, click![](https://lh7-us.googleusercontent.com/docsz/AD_4nXf_5emtE1rfZHBdCGzAPUC9ksu__cZkhl3P3XesNV6buOj3c0lrWWqXHJ04TS2jGODrcHni5sXeQn8flB8K8EIigJJPpR-bWpIbRobACSBftmruLXzipKbF-Ah8gpVv4afY2yhTsmjKOur7u84KrNyeqjNu?key=fjqBSIeK_DDgXRG_cRbrLA) and then toggle on **Show Only Custom Lines**.\
   Only your custom line items appear in the financial plan.
4. Toggle off **Show Only Custom Lines** to return to the full financial plan list.

#### **Ignore Line Items**

Ignore individual or multiple line items to ensure they are not part of your plan. The line item is not deleted, but its data will not be included in the financial plan calculation.

{% hint style="info" %}
**Note**: Only Admins can ignore items, view ignored items, and reinclude them into the plan.
{% endhint %}

**To ignore one line item**:

1. Navigate to **Financial Plans**.\
   You are brought to the Financial Plans list.

   <figure><img src="https://3858159242-files.gitbook.io/~/files/v0/b/gitbook-x-prod.appspot.com/o/spaces%2FWqjB2puKXPDR7L86FX2e%2Fuploads%2FZa0aG0AKmZz4nFrDknyY%2Fimage.png?alt=media&#x26;token=2955f42b-172a-48e2-9138-d126f8fe172c" alt=""><figcaption></figcaption></figure>

   <figure><img src="https://downloads.intercomcdn.eu/i/o/20208114/c05579c6d7bbebae7e4158be/image.png?expires=1727308800&#x26;signature=0d515de05f596665dfb1663f29d8ebd76cf9ee07efb571276df2c9e9131774e6&#x26;req=0tVtxVD7rTNk2hj99dpg6uqf3m3NEkP7IT6tRsD8Bx6hMuJwF4zWlPVbISnC%0AXftBP61nK9f6I7fAVcyRA8zN%0A" alt=""><figcaption></figcaption></figure>
2. Choose a financial plan.\
   You are brought to the **Financial Plan Details** tab.

   <figure><img src="https://3858159242-files.gitbook.io/~/files/v0/b/gitbook-x-prod.appspot.com/o/spaces%2FWqjB2puKXPDR7L86FX2e%2Fuploads%2FyYHOEEsNcMxPDXrZnApB%2Fimage.png?alt=media&#x26;token=4b3f8477-43b8-4414-a25a-8114e743f540" alt=""><figcaption></figcaption></figure>

   <figure><img src="https://downloads.intercomcdn.eu/i/o/20220376/2d49a7907021f1b0782cef37/image.png?expires=1727308800&#x26;signature=b4e8478de1fc367374ba84405a8976d30cd3f7cc0eef35a381ac4f871f5f6df5&#x26;req=0tVtx1j5qzFk2hj99dpg6nvSCRZIcFU3zPz%2BgcV0WZjMf9iP6h35laGC5Yxi%0AyiyBwfVdZ1R5B7b2vtpirXWA%0A" alt=""><figcaption></figcaption></figure>
3. In your financial plan, find the line item you want to ignore and toggle it off.\
   The line item and its data are ignored.

   <div data-gb-custom-block data-tag="hint" data-style="info" class="hint hint-info"><p><strong>Note</strong>: Ignored lines are not shown in the view.</p></div>

**To ignore multiple line items**:

1. Navigate to **Financial Plans**.\
   You are brought to the Financial Plans list.

   <figure><img src="https://3858159242-files.gitbook.io/~/files/v0/b/gitbook-x-prod.appspot.com/o/spaces%2FWqjB2puKXPDR7L86FX2e%2Fuploads%2FSz3p2ib0SZng05lohcE7%2Fimage.png?alt=media&#x26;token=f8509cba-acff-4c5c-a3b7-7fc34c6ba1af" alt=""><figcaption></figcaption></figure>

   <figure><img src="https://downloads.intercomcdn.eu/i/o/20208114/c05579c6d7bbebae7e4158be/image.png?expires=1727308800&#x26;signature=0d515de05f596665dfb1663f29d8ebd76cf9ee07efb571276df2c9e9131774e6&#x26;req=0tVtxVD7rTNk2hj99dpg6uqf3m3NEkP7IT6tRsD8Bx6hMuJwF4zWlPVbISnC%0AXftBP61nK9f6I7fAVcyRA8zN%0A" alt=""><figcaption></figcaption></figure>
2. Choose a financial plan.\
   You are brought to the **Financial Plan Details** tab.

   <figure><img src="https://3858159242-files.gitbook.io/~/files/v0/b/gitbook-x-prod.appspot.com/o/spaces%2FWqjB2puKXPDR7L86FX2e%2Fuploads%2FZeFZAuQF7MAPldREcFgb%2Fimage.png?alt=media&#x26;token=50ece22a-00d4-4d00-850d-b9d0b4cef626" alt=""><figcaption></figcaption></figure>

   <figure><img src="https://downloads.intercomcdn.eu/i/o/20220008/ad3d43dbab80998eaa84e1dd/image.png?expires=1727308800&#x26;signature=31470486b2019585a1310f0e1daea791aa4e414e8c5a9cb64ac7c61a8ea7629a&#x26;req=0tVtx1j6rD9k2hj99dpg6nPPflKqEmO7Y4JyYjagVIBLd9samEUr1vZ12cId%0Akr2Jad%2FWdh71M9t%2F3btj53Wu%0A" alt=""><figcaption></figcaption></figure>
3. In your financial plan, find line items you want to ignore. Mark the checkbox at the beginning of each line item.\
   The **Change Status** bar appears at the bottom of the financial plan.

   <figure><img src="https://3858159242-files.gitbook.io/~/files/v0/b/gitbook-x-prod.appspot.com/o/spaces%2FWqjB2puKXPDR7L86FX2e%2Fuploads%2FvmiRDVM1wsIPC7fDII2Y%2Fimage.png?alt=media&#x26;token=b0e6ded5-e0f6-4ccb-abe8-644c470c153a" alt=""><figcaption></figcaption></figure>

   <figure><img src="https://downloads.intercomcdn.eu/i/o/20231109/446f60ccd1517f514b026be0/image.png?expires=1727308800&#x26;signature=b5adbbe01a92d4b35bd220d4d8e7b2ac4192da68dc0bb09b529c3d62d18c1803&#x26;req=0tVtxln7rD5k2hj99dpg6n5ZGpAfSkKGohUuijjHymMSBjbDUJ6l3ghOh4x2%0Am0PmuChdIWuiTRVbj9b1zjXR%0A" alt=""><figcaption></figcaption></figure>
4. Click **Change Status**.\
   A dropdown appears.\
   ![](https://3858159242-files.gitbook.io/~/files/v0/b/gitbook-x-prod.appspot.com/o/spaces%2FWqjB2puKXPDR7L86FX2e%2Fuploads%2FjWprxa5ufobEWZtRQDXv%2Fimage.png?alt=media\&token=37824885-b8a2-4f99-81d9-52b83e61748c)
5. Choose to **Ignore** the chosen line items.\
   The line items are ignored.<br>

   <div data-gb-custom-block data-tag="hint" data-style="info" class="hint hint-info"><p><strong>Note</strong>: Ignored lines are not shown in the view.</p></div>

**To show ignored line items**:

1. Navigate to **Financial Plans**.\
   You are brought to the Financial Plans list.

   <figure><img src="https://3858159242-files.gitbook.io/~/files/v0/b/gitbook-x-prod.appspot.com/o/spaces%2FWqjB2puKXPDR7L86FX2e%2Fuploads%2F9T3JF0kfpCv2n2w05lsg%2Fimage.png?alt=media&#x26;token=8e46f5a5-0cd5-4e01-ba4e-60369c01d3ea" alt=""><figcaption></figcaption></figure>

   <figure><img src="https://downloads.intercomcdn.eu/i/o/20208114/c05579c6d7bbebae7e4158be/image.png?expires=1727308800&#x26;signature=0d515de05f596665dfb1663f29d8ebd76cf9ee07efb571276df2c9e9131774e6&#x26;req=0tVtxVD7rTNk2hj99dpg6uqf3m3NEkP7IT6tRsD8Bx6hMuJwF4zWlPVbISnC%0AXftBP61nK9f6I7fAVcyRA8zN%0A" alt=""><figcaption></figcaption></figure>
2. Choose a financial plan.\
   You are brought to the **Financial Plan Details** tab.

   <figure><img src="https://3858159242-files.gitbook.io/~/files/v0/b/gitbook-x-prod.appspot.com/o/spaces%2FWqjB2puKXPDR7L86FX2e%2Fuploads%2FNvMRagfHpead0TbSdrh0%2Fimage.png?alt=media&#x26;token=3d9b3111-0b80-49d4-9322-49b893f6a6bd" alt=""><figcaption></figcaption></figure>

   <figure><img src="https://downloads.intercomcdn.eu/i/o/20219732/e3254014065127f7ef8ff726/image.png?expires=1727308800&#x26;signature=5da30da7291181385721e69671eb8bdb68bfccc107f33752d66c1538569b7722&#x26;req=0tVtxFH9rzVk2hj99dpg6grsjWNdIOAIammGbXannaHmz1aAHRs1K2A87ZEh%0AFavbjeGMtaAmNtWxS2zLvdrm%0A" alt=""><figcaption></figcaption></figure>
3. In your financial plan, click![](https://lh7-us.googleusercontent.com/docsz/AD_4nXf_5emtE1rfZHBdCGzAPUC9ksu__cZkhl3P3XesNV6buOj3c0lrWWqXHJ04TS2jGODrcHni5sXeQn8flB8K8EIigJJPpR-bWpIbRobACSBftmruLXzipKbF-Ah8gpVv4afY2yhTsmjKOur7u84KrNyeqjNu?key=fjqBSIeK_DDgXRG_cRbrLA) and then toggle on **Show Ignored Line Items**.\
   Your ignored line items reappear.

#### **Comment on a Line Item**

Commenting on a line item enables you to add notes, feedback, or explanations directly to individual line items within a financial plan, facilitating clear communication and better financial management.

**To comment on a line item**:

1. Navigate to **Financial Plans**.\
   You are brought to the **Financial Plans list**.

   <figure><img src="https://3858159242-files.gitbook.io/~/files/v0/b/gitbook-x-prod.appspot.com/o/spaces%2FWqjB2puKXPDR7L86FX2e%2Fuploads%2Fsoh3UVU7igz9dJtlN80i%2Fimage.png?alt=media&#x26;token=a606e6d6-edf1-41a0-9a43-ce511e72a0b1" alt=""><figcaption></figcaption></figure>

   <figure><img src="https://downloads.intercomcdn.eu/i/o/20208114/c05579c6d7bbebae7e4158be/image.png?expires=1727308800&#x26;signature=0d515de05f596665dfb1663f29d8ebd76cf9ee07efb571276df2c9e9131774e6&#x26;req=0tVtxVD7rTNk2hj99dpg6uqf3m3NEkP7IT6tRsD8Bx6hMuJwF4zWlPVbISnC%0AXftBP61nK9f6I7fAVcyRA8zN%0A" alt=""><figcaption></figcaption></figure>
2. Choose a financial plan.\
   You are brought to the **Financial Plan Details** tab.

   <figure><img src="https://3858159242-files.gitbook.io/~/files/v0/b/gitbook-x-prod.appspot.com/o/spaces%2FWqjB2puKXPDR7L86FX2e%2Fuploads%2FOMwYzZEEcEsydWFvW3EK%2Fimage.png?alt=media&#x26;token=aa40aa37-2cc4-4839-8e49-37eb97aa5634" alt=""><figcaption></figcaption></figure>

   <figure><img src="https://downloads.intercomcdn.eu/i/o/20218276/8dd95dcb4fedad281eda7a4d/image.png?expires=1727308800&#x26;signature=5dae7a35c4f67d9646f98ec9adb217b5eaba39ae83b5ee0d4c89c4dd0734f3e3&#x26;req=0tVtxFD4qzFk2hj99dpg6s0HY3TRRzFfCGbLTtNssueVDnRoheqIGIucQn7J%0A2%2BgOc1kS7qr6AdEsdMEiM5G5%0A" alt=""><figcaption></figcaption></figure>
3. In the comment column of your financial plan, click ![](https://lh7-rt.googleusercontent.com/docsz/AD_4nXdEE1oh8BnMGR-0LfQkYRJ1GUpQt62RJdhme6_snySpw0-ZrMyduUL_aqxY7IEP0Cp_4w-9ZhFEXTMWzvI-9LAzlRUcVTiOqhpjq8yyuvMBZOR21TAsoyDMuz5h0lAl7ydLjLXYv-9rV_ZQsAAovtt-TBJV?key=fjqBSIeK_DDgXRG_cRbrLA) for the line item you want to comment on.\
   The commenting popup appears.\
   ​![](https://3858159242-files.gitbook.io/~/files/v0/b/gitbook-x-prod.appspot.com/o/spaces%2FWqjB2puKXPDR7L86FX2e%2Fuploads%2FeSvxXLc0MeYuBkKEq7wD%2Fimage.png?alt=media\&token=f9f2850b-9cef-44a6-a374-c74f0a3ef2c7)
4. Write a comment and then click **Save**.\
   ​Your comment is saved.

   <div data-gb-custom-block data-tag="hint" data-style="info" class="hint hint-info"><p><strong>Note</strong>: You can sort the column so lines with comments will appear at the top by clicking <img src="https://lh7-rt.googleusercontent.com/docsz/AD_4nXdp-4OCO-LvX1Z6tw_uy7MfbAhfbnTmCOlYlTBCgkj7gNOVLD26xdDwBsPY2ZC33I-L3HXe0-wXA2Uvf_lxrMUZdLCqU_G9so_QX0YOJtIQNfndpjmjOxdxgHGu95jwLvDq77oudnXssxgaO3n2vQI8O2xz?key=fjqBSIeK_DDgXRG_cRbrLA" alt="">> <strong>Sort Descending</strong> by the comments column.</p></div>

**To edit a comment**:

1. Navigate to **Financial Plans**.\
   You are brought to the Financial Plans list.

   <figure><img src="https://3858159242-files.gitbook.io/~/files/v0/b/gitbook-x-prod.appspot.com/o/spaces%2FWqjB2puKXPDR7L86FX2e%2Fuploads%2Fn0VMQMhWoojWxTJaZPqu%2Fimage.png?alt=media&#x26;token=002688bf-1d1e-42ff-9fae-acb43291cfae" alt=""><figcaption></figcaption></figure>

   <figure><img src="https://downloads.intercomcdn.eu/i/o/20208114/c05579c6d7bbebae7e4158be/image.png?expires=1727308800&#x26;signature=0d515de05f596665dfb1663f29d8ebd76cf9ee07efb571276df2c9e9131774e6&#x26;req=0tVtxVD7rTNk2hj99dpg6uqf3m3NEkP7IT6tRsD8Bx6hMuJwF4zWlPVbISnC%0AXftBP61nK9f6I7fAVcyRA8zN%0A" alt=""><figcaption></figcaption></figure>
2. Choose a financial plan.\
   You are brought to the **Financial Plan Details** tab.

   <figure><img src="https://3858159242-files.gitbook.io/~/files/v0/b/gitbook-x-prod.appspot.com/o/spaces%2FWqjB2puKXPDR7L86FX2e%2Fuploads%2FhqdK2iTBxdgqHqkQ8r2J%2Fimage.png?alt=media&#x26;token=5ea9c3c3-cf6e-4d0c-98f7-a182cde9032d" alt=""><figcaption></figcaption></figure>

   <figure><img src="https://downloads.intercomcdn.eu/i/o/20218276/8dd95dcb4fedad281eda7a4d/image.png?expires=1727308800&#x26;signature=5dae7a35c4f67d9646f98ec9adb217b5eaba39ae83b5ee0d4c89c4dd0734f3e3&#x26;req=0tVtxFD4qzFk2hj99dpg6s0HY3TRRzFfCGbLTtNssueVDnRoheqIGIucQn7J%0A2%2BgOc1kS7qr6AdEsdMEiM5G5%0A" alt=""><figcaption></figcaption></figure>
3. In the comment column of your financial plan, click ![](https://lh7-rt.googleusercontent.com/docsz/AD_4nXezfjz0Gtirfp5ZIH21IJ64VWGNguQd_6RoPmNlAL1_Xs4m8buZwjHQLEUV14JToyADidLOfFFr5UTKB-81tddcBnixF2kKK9TICCxykAXCTUYxExroF5KPlhmBZSaWnqnbuliRYYqxyKkDk7p19cgHlI07?key=fjqBSIeK_DDgXRG_cRbrLA) for the comment you want to edit.\
   The commenting popup appears.
4. Make your changes to the comment and click **Save**.

**To delete a comment on a line item**:

1. Navigate to **Financial Plans**.\
   You are brought to the Financial Plans list.

   <figure><img src="https://3858159242-files.gitbook.io/~/files/v0/b/gitbook-x-prod.appspot.com/o/spaces%2FWqjB2puKXPDR7L86FX2e%2Fuploads%2FVuGzguCN8Nr0kNfByb3S%2Fimage.png?alt=media&#x26;token=ff38d7ea-5358-4f64-95b0-831504d8bc7d" alt=""><figcaption></figcaption></figure>

   <figure><img src="https://downloads.intercomcdn.eu/i/o/20208114/c05579c6d7bbebae7e4158be/image.png?expires=1727308800&#x26;signature=0d515de05f596665dfb1663f29d8ebd76cf9ee07efb571276df2c9e9131774e6&#x26;req=0tVtxVD7rTNk2hj99dpg6uqf3m3NEkP7IT6tRsD8Bx6hMuJwF4zWlPVbISnC%0AXftBP61nK9f6I7fAVcyRA8zN%0A" alt=""><figcaption></figcaption></figure>
2. Choose a financial plan.\
   You are brought to the **Financial Plan Details** tab.

   <figure><img src="https://3858159242-files.gitbook.io/~/files/v0/b/gitbook-x-prod.appspot.com/o/spaces%2FWqjB2puKXPDR7L86FX2e%2Fuploads%2F88sAA4e2WzldHJFHPr99%2Fimage.png?alt=media&#x26;token=48eb5cc7-2c24-4153-98cc-8dc845bb2814" alt=""><figcaption></figcaption></figure>

   <figure><img src="https://downloads.intercomcdn.eu/i/o/20218276/8dd95dcb4fedad281eda7a4d/image.png?expires=1727308800&#x26;signature=5dae7a35c4f67d9646f98ec9adb217b5eaba39ae83b5ee0d4c89c4dd0734f3e3&#x26;req=0tVtxFD4qzFk2hj99dpg6s0HY3TRRzFfCGbLTtNssueVDnRoheqIGIucQn7J%0A2%2BgOc1kS7qr6AdEsdMEiM5G5%0A" alt=""><figcaption></figcaption></figure>
3. In the comment column of your financial plan, click ![](https://lh7-rt.googleusercontent.com/docsz/AD_4nXezfjz0Gtirfp5ZIH21IJ64VWGNguQd_6RoPmNlAL1_Xs4m8buZwjHQLEUV14JToyADidLOfFFr5UTKB-81tddcBnixF2kKK9TICCxykAXCTUYxExroF5KPlhmBZSaWnqnbuliRYYqxyKkDk7p19cgHlI07?key=fjqBSIeK_DDgXRG_cRbrLA) for the comment you want to delete.\
   The commenting popup appears.

   <div align="left"><figure><img src="https://downloads.intercomcdn.eu/i/o/20218364/4d8b3fa996cc3b2c58c152d5/image.png?expires=1727308800&#x26;signature=e1c0351f8a3a51ad4d5cb3ba43cd1588c4447a2dc472875253cc9ad76b015719&#x26;req=0tVtxFD5qjNk2hj99dpg6rG4jQCy9MF1PjKhmQpu%2FrQmiNBVAVabP91ZgAnx%0A%2BYGUOAjiwapfmnNdiA3v34m1%0A" alt=""><figcaption></figcaption></figure></div>
4. Click **Delete**.\
   The **Delete this comment** popup appears.

   <div align="left"><figure><img src="https://downloads.intercomcdn.eu/i/o/20218648/88554b38006afdf66ac1d521/image.png?expires=1727308800&#x26;signature=55ba323117337869500f7700d3a65499aeab0db725a93d112a68d880210a277e&#x26;req=0tVtxFD8qD9k2hj99dpg6lrF5CcLqT2%2FU8%2FKCchHQKTF8sAezpw9nPir%2FfIl%0AL4KqsLpjYhs2%2FMuTKOZfu%2FZh%0A" alt=""><figcaption></figcaption></figure></div>
5. Click **Delete**.\
   The comment is deleted.

#### **Investigate a Line Item in MegaBill**

1. Navigate to **Financial Plans**.\
   You are brought to the Financial Plans list.

   <figure><img src="https://3858159242-files.gitbook.io/~/files/v0/b/gitbook-x-prod.appspot.com/o/spaces%2FWqjB2puKXPDR7L86FX2e%2Fuploads%2F8ucIS6DC8mo2C8EN8KZR%2Fimage.png?alt=media&#x26;token=33f6c6b6-4a5b-41f7-84bd-09856a9ad6a4" alt=""><figcaption></figcaption></figure>
2. Choose a financial plan.\
   You are brought to the **Financial Plan Details** list.<br>

   <figure><img src="https://3858159242-files.gitbook.io/~/files/v0/b/gitbook-x-prod.appspot.com/o/spaces%2FWqjB2puKXPDR7L86FX2e%2Fuploads%2Fa7Djis83ExADvzb7mqas%2Fimage.png?alt=media&#x26;token=15e83593-a79f-40eb-9ec4-0afdce381794" alt=""><figcaption></figcaption></figure>
3. **Click on an Actual Cost** cell of a specific month that you want to investigate.

   You are brought to MegaBill, filtered for that value and month.<br>

   <figure><img src="https://3858159242-files.gitbook.io/~/files/v0/b/gitbook-x-prod.appspot.com/o/spaces%2FWqjB2puKXPDR7L86FX2e%2Fuploads%2Fx9lxg53ERIfDQgP2m4tH%2Fimage.png?alt=media&#x26;token=efcd1e91-46e8-4161-b09f-2d6411d03905" alt=""><figcaption></figcaption></figure>

### **Plan Settings and Controls**

#### **Edit Financial Plan Configuration**

Edit your plan settings to optimize functionality and meet specific objectives efficiently.

**To edit plan settings**:

1. Navigate to **Financial Plans**.\
   You are brought to the Financial Plans list.

   <figure><img src="https://3858159242-files.gitbook.io/~/files/v0/b/gitbook-x-prod.appspot.com/o/spaces%2FWqjB2puKXPDR7L86FX2e%2Fuploads%2FtzmH0EcnZiDOiQ8rplva%2Fimage.png?alt=media&#x26;token=f527f557-5ff0-44ea-a437-9d79f4dbd339" alt=""><figcaption></figcaption></figure>

   <figure><img src="https://downloads.intercomcdn.eu/i/o/20208114/c05579c6d7bbebae7e4158be/image.png?expires=1727308800&#x26;signature=0d515de05f596665dfb1663f29d8ebd76cf9ee07efb571276df2c9e9131774e6&#x26;req=0tVtxVD7rTNk2hj99dpg6uqf3m3NEkP7IT6tRsD8Bx6hMuJwF4zWlPVbISnC%0AXftBP61nK9f6I7fAVcyRA8zN%0A" alt=""><figcaption></figcaption></figure>
2. Choose a financial plan.\
   You are brought to the **Financial Plan Details** tab.

   <figure><img src="https://3858159242-files.gitbook.io/~/files/v0/b/gitbook-x-prod.appspot.com/o/spaces%2FWqjB2puKXPDR7L86FX2e%2Fuploads%2FEzlWSHQ4W6JtMZElguN1%2Fimage.png?alt=media&#x26;token=7769287a-ac2c-46c4-aac4-460bec5ba9e7" alt=""><figcaption></figcaption></figure>

   <figure><img src="https://downloads.intercomcdn.eu/i/o/20216913/05786e943e3c639466ec45cb/image.png?expires=1727308800&#x26;signature=4dc1048ce3b6782c5d009f93d3dc1ffb97dfdc56355f90ccc159868cf33bea7b&#x26;req=0tVtxF7zrTRk2hj99dpg6jXlQuzQHZhKhWybNUmZ1dcjF7mWSKY3fnPLhysg%0A0vZj5FObDjLqssInUFMm2Zs5%0A" alt=""><figcaption></figcaption></figure>
3. In your financial plan, click ![](https://lh7-us.googleusercontent.com/docsz/AD_4nXfrtRs2Y4g6RShDY6v5aQ4upZzl5sqo7BHe0bPPwAoBEfcNLPjvZDxboa8NsS0xf16Mrn_EA7DtHKfurjKtvquBJNWXE1RnItxfHp86h-vFOK4kW3N8xfvXHlmSROP5qaMcbZS-xbhybeoNIBYAR67Z8RcX?key=fjqBSIeK_DDgXRG_cRbrLA)next to the financial plan name.\
   The edit settings popup appears.

   <figure><img src="https://3858159242-files.gitbook.io/~/files/v0/b/gitbook-x-prod.appspot.com/o/spaces%2FWqjB2puKXPDR7L86FX2e%2Fuploads%2FcICgzmhhbGPJgEqIwpF2%2Fimage.png?alt=media&#x26;token=11dd7608-6afd-4c98-8ce1-ad3244b51f83" alt=""><figcaption></figcaption></figure>
4. You can edit the following:
   1. **Financial plan name**: Enter a financial plan name.
   2. [**ACL permissions**](https://docs.finout.io/cross-platform-features/list-of-cross-platform-features/acl-permissions):

      You can set **read** and **write** permissions as either **Public**, **Private**, and **Shared**. Permission for an object is granted if a user or group have a role with the proper permission and also ACL permission to access the object. By default, ACL permissions for read and write access are public, meaning users can view or modify an object if they have [Role-Based Access Control (RBAC)](https://docs.finout.io/settings/role-based-access-control-rbac)  to read or write the object.&#x20;

      <div align="left"><figure><img src="https://3858159242-files.gitbook.io/~/files/v0/b/gitbook-x-prod.appspot.com/o/spaces%2FWqjB2puKXPDR7L86FX2e%2Fuploads%2FUBSaiFXMUs3YOa0irK6A%2Fimage.png?alt=media&#x26;token=644caf7a-fcfc-46d5-a85b-bd38edcf33c7" alt=""><figcaption></figcaption></figure></div>

      * **Types of ACL Permissions:**
        * **Public:** Grants access to anyone in the organization that has Role-Based Access Control (RBAC).
        * **Private:** Restricts access to admins and the user who created the object.
        * **Shared:** Limits access to specific users or groups that have Role-Based Access Control (RBAC).&#x20;

          <div data-gb-custom-block data-tag="hint" data-style="info" class="hint hint-info"><p><strong>Note</strong>: Admins and creators always retain access.</p></div>

          <div align="left"><figure><img src="https://3858159242-files.gitbook.io/~/files/v0/b/gitbook-x-prod.appspot.com/o/spaces%2FWqjB2puKXPDR7L86FX2e%2Fuploads%2F27KL2RmzFFl6qBfehjvh%2Fimage.png?alt=media&#x26;token=b8dabe01-47d7-46ce-9192-8edf230ac2fa" alt=""><figcaption></figcaption></figure></div>
5. Click **Save**.\
   Your changes are implemented into the plan.

#### Edit Run Rate Alerts&#x20;

Edit your run rate alerts to notify you when the monthly run rate for any given line item exceeds its budgeted amount, allowing you to make timely adjustments to stay on target with your financial goals.\
\
**To edit your run rate alert:**

1. Navigate to **Financial Plans**.\
   You are brought to the Financial Plans list.

   <figure><img src="https://3858159242-files.gitbook.io/~/files/v0/b/gitbook-x-prod.appspot.com/o/spaces%2FWqjB2puKXPDR7L86FX2e%2Fuploads%2FpgHmCPNkBLECgIi2crQS%2Fimage.png?alt=media&#x26;token=0e778dc2-b288-40e8-8e77-2bb58546ae18" alt=""><figcaption></figcaption></figure>

   <figure><img src="https://downloads.intercomcdn.eu/i/o/20208114/c05579c6d7bbebae7e4158be/image.png?expires=1727308800&#x26;signature=0d515de05f596665dfb1663f29d8ebd76cf9ee07efb571276df2c9e9131774e6&#x26;req=0tVtxVD7rTNk2hj99dpg6uqf3m3NEkP7IT6tRsD8Bx6hMuJwF4zWlPVbISnC%0AXftBP61nK9f6I7fAVcyRA8zN%0A" alt=""><figcaption></figcaption></figure>
2. Choose a financial plan.\
   You are brought to the **Financial Plan Details** tab.

   <figure><img src="https://3858159242-files.gitbook.io/~/files/v0/b/gitbook-x-prod.appspot.com/o/spaces%2FWqjB2puKXPDR7L86FX2e%2Fuploads%2FRbYh4WkabzAiaUT42VUZ%2Fimage.png?alt=media&#x26;token=851477cd-d9ab-4adb-b29d-43cfa09cc16b" alt=""><figcaption></figcaption></figure>

   <figure><img src="https://downloads.intercomcdn.eu/i/o/20216913/05786e943e3c639466ec45cb/image.png?expires=1727308800&#x26;signature=4dc1048ce3b6782c5d009f93d3dc1ffb97dfdc56355f90ccc159868cf33bea7b&#x26;req=0tVtxF7zrTRk2hj99dpg6jXlQuzQHZhKhWybNUmZ1dcjF7mWSKY3fnPLhysg%0A0vZj5FObDjLqssInUFMm2Zs5%0A" alt=""><figcaption></figcaption></figure>
3. In your financial plan, click ![](https://lh7-us.googleusercontent.com/docsz/AD_4nXfrtRs2Y4g6RShDY6v5aQ4upZzl5sqo7BHe0bPPwAoBEfcNLPjvZDxboa8NsS0xf16Mrn_EA7DtHKfurjKtvquBJNWXE1RnItxfHp86h-vFOK4kW3N8xfvXHlmSROP5qaMcbZS-xbhybeoNIBYAR67Z8RcX?key=fjqBSIeK_DDgXRG_cRbrLA)next to the financial plan name.\
   The edit settings popup appears.<br>

   <figure><img src="https://3858159242-files.gitbook.io/~/files/v0/b/gitbook-x-prod.appspot.com/o/spaces%2FWqjB2puKXPDR7L86FX2e%2Fuploads%2FLlJHoQTOjGBUkrL7BcNi%2Fimage.png?alt=media&#x26;token=d6bdb18f-9372-43a6-8ef6-3b2c17f4952f" alt=""><figcaption></figcaption></figure>
4. Click the **Run Rate Alert** tab.<br>

   <figure><img src="https://3858159242-files.gitbook.io/~/files/v0/b/gitbook-x-prod.appspot.com/o/spaces%2FWqjB2puKXPDR7L86FX2e%2Fuploads%2FK9gInrUu3cXdc1Az1fMI%2Fimage.png?alt=media&#x26;token=1d385dec-982e-4a92-99c4-b18f20449027" alt=""><figcaption></figcaption></figure>
5. Toggle on Enable Run Rate Alert and follow the steps in [Run Rate Alerts](#id-4.-run-rate-alerts) to edit the alert.

#### **Edit Customizations**

Customized delta, shown in both the financial plan’s details table and dashboard, aligns with your specific planning and analysis needs.

**To edit your Delta Customization:**

1. Navigate to **Financial Plans**.\
   You are brought to the Financial Plans list.<br>

   <figure><img src="https://3858159242-files.gitbook.io/~/files/v0/b/gitbook-x-prod.appspot.com/o/spaces%2FWqjB2puKXPDR7L86FX2e%2Fuploads%2FfiK8ZN17qRwRq70lndpB%2Fimage.png?alt=media&#x26;token=be799c9e-ea03-4d50-9b20-7771a4258f51" alt=""><figcaption></figcaption></figure>

<figure><img src="https://downloads.intercomcdn.eu/i/o/20208114/c05579c6d7bbebae7e4158be/image.png?expires=1727308800&#x26;signature=0d515de05f596665dfb1663f29d8ebd76cf9ee07efb571276df2c9e9131774e6&#x26;req=0tVtxVD7rTNk2hj99dpg6uqf3m3NEkP7IT6tRsD8Bx6hMuJwF4zWlPVbISnC%0AXftBP61nK9f6I7fAVcyRA8zN%0A" alt=""><figcaption></figcaption></figure>

2. Choose a financial plan.\
   You are brought to the **Financial Plan Details** tab.<br>

   <figure><img src="https://3858159242-files.gitbook.io/~/files/v0/b/gitbook-x-prod.appspot.com/o/spaces%2FWqjB2puKXPDR7L86FX2e%2Fuploads%2FTrkcuKVGtUJG9hxNSVRc%2Fimage.png?alt=media&#x26;token=ebc55481-3549-4dc3-b800-e8af93f01825" alt=""><figcaption></figcaption></figure>

<figure><img src="https://downloads.intercomcdn.eu/i/o/20216913/05786e943e3c639466ec45cb/image.png?expires=1727308800&#x26;signature=4dc1048ce3b6782c5d009f93d3dc1ffb97dfdc56355f90ccc159868cf33bea7b&#x26;req=0tVtxF7zrTRk2hj99dpg6jXlQuzQHZhKhWybNUmZ1dcjF7mWSKY3fnPLhysg%0A0vZj5FObDjLqssInUFMm2Zs5%0A" alt=""><figcaption></figcaption></figure>

3. In your financial plan, click ![](https://lh7-us.googleusercontent.com/docsz/AD_4nXfrtRs2Y4g6RShDY6v5aQ4upZzl5sqo7BHe0bPPwAoBEfcNLPjvZDxboa8NsS0xf16Mrn_EA7DtHKfurjKtvquBJNWXE1RnItxfHp86h-vFOK4kW3N8xfvXHlmSROP5qaMcbZS-xbhybeoNIBYAR67Z8RcX?key=fjqBSIeK_DDgXRG_cRbrLA)next to the financial plan name.\
   The edit settings popup appears.<br>

   <figure><img src="https://3858159242-files.gitbook.io/~/files/v0/b/gitbook-x-prod.appspot.com/o/spaces%2FWqjB2puKXPDR7L86FX2e%2Fuploads%2F8zRb9zHGyX8Cb95zTjbl%2Fimage.png?alt=media&#x26;token=6cbf1f83-c429-4ac3-bf79-f52801427842" alt=""><figcaption></figcaption></figure>
4. Click the **Customizations** tab.<br>

   <figure><img src="https://3858159242-files.gitbook.io/~/files/v0/b/gitbook-x-prod.appspot.com/o/spaces%2FWqjB2puKXPDR7L86FX2e%2Fuploads%2Fh6GvHAAQBmtooWZek8PA%2Fimage.png?alt=media&#x26;token=fb2a7110-61e4-4fc4-a484-d0f68bfa6467" alt=""><figcaption></figcaption></figure>
5. Change the metrics and click **Save**.\
   Your changes are implemented into the plan.

#### **Sync your Financial Plan**

Changes made to virtual tags or Megabill keys can alter the keys that define your financial plan. If the values or the metadata of the virtual tag keys that define this financial plan have changed, a ‘Sync required’ icon will appear. Duplicate your financial plan to enable a sync with all the new key values.&#x20;

{% hint style="info" %}
**Note**:&#x20;

* Only Admins can duplicate or synd financial plans.
* Financial plans support up to 1,000 line items. If syncing would cause the plan to exceed this limit, it will not proceed.
  {% endhint %}

**To sync your financial plan:**

1. Navigate to **Financial Plans**.\
   You are brought to the Financial Plans list.

   <figure><img src="https://3858159242-files.gitbook.io/~/files/v0/b/gitbook-x-prod.appspot.com/o/spaces%2FWqjB2puKXPDR7L86FX2e%2Fuploads%2F52RljlDHQxehuBHjrsWi%2Fimage.png?alt=media&#x26;token=88a898c3-f587-4196-8f21-34b63dc4f9cb" alt=""><figcaption></figcaption></figure>

   <figure><img src="https://downloads.intercomcdn.eu/i/o/20208114/c05579c6d7bbebae7e4158be/image.png?expires=1727308800&#x26;signature=0d515de05f596665dfb1663f29d8ebd76cf9ee07efb571276df2c9e9131774e6&#x26;req=0tVtxVD7rTNk2hj99dpg6uqf3m3NEkP7IT6tRsD8Bx6hMuJwF4zWlPVbISnC%0AXftBP61nK9f6I7fAVcyRA8zN%0A" alt=""><figcaption></figcaption></figure>
2. Choose a financial plan.\
   You are brought to the **Financial Plan Details** tab.<br>

   <figure><img src="https://downloads.intercomcdn.eu/i/o/20210438/198d1939dc0c0578175b20fd/image.png?expires=1727308800&#x26;signature=5fea68f857680db3055f9341b1a89fec382d91e0d78835d2d314071aee151413&#x26;req=0tVtxFj%2Brz9k2hj99dpg6oeHJYIlUlNivyQts%2FCeYDrlFp2GmVWrUtoxFF6Y%0AmTgBL8gUMPggQvwGtnNjCJCH%0A" alt=""><figcaption></figcaption></figure>

   <figure><img src="https://3858159242-files.gitbook.io/~/files/v0/b/gitbook-x-prod.appspot.com/o/spaces%2FWqjB2puKXPDR7L86FX2e%2Fuploads%2FVjd5QDrOACddGr3ACai9%2Fimage.png?alt=media&#x26;token=d833873c-c348-4a52-845b-685f548d748f" alt=""><figcaption></figcaption></figure>
3. In your Financial Plan, click![](https://lh7-us.googleusercontent.com/docsz/AD_4nXf_5emtE1rfZHBdCGzAPUC9ksu__cZkhl3P3XesNV6buOj3c0lrWWqXHJ04TS2jGODrcHni5sXeQn8flB8K8EIigJJPpR-bWpIbRobACSBftmruLXzipKbF-Ah8gpVv4afY2yhTsmjKOur7u84KrNyeqjNu?key=fjqBSIeK_DDgXRG_cRbrLA), and then click **Duplicate Plan** or click <img src="https://lh7-us.googleusercontent.com/docsz/AD_4nXe7TQ5vWOenfmngi2PbFGgqFQEOvimcrGS4iqhlDTWc8WcFE3ts9Q9Aob7JRw1SbHiReTJR8jehKd49ZMGVDNeMCMsKneFCAIRdED2T7jZnbBRLTUO_kkJcUWrxhJJvJwg1q3_8i02Ll-343-nuBOruCt4?key=fjqBSIeK_DDgXRG_cRbrLA" alt="" data-size="line">at the top right of the plan.\
   The Duplicate Financial Plan window appears.\
   ![](https://3858159242-files.gitbook.io/~/files/v0/b/gitbook-x-prod.appspot.com/o/spaces%2FWqjB2puKXPDR7L86FX2e%2Fuploads%2FJ7t4EvYDQWU8mFdgp05m%2Fimage.png?alt=media\&token=c54911fd-5352-4319-84ab-9bf8e46058bd)
4. Mark **Duplicate and include recent updates**; optionally add a new name and click **Duplicate**.\
   Your financial plan is duplicated and synced.

**Sync FAQ**:

* **Question**: Why does my financial plan require a sync, and what causes it to be out of sync?

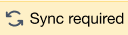
  **Answer**: Changes to virtual tags can alter the line items defined in your financial plan. If a financial plan's virtual tags values or metadata have been changed, a ‘Sync required’ icon will appear, indicating that the plan needs to be updated.
* **Question**: What happens to a line item after a sync if its virtual tag value has been deleted?

  **Answer**: After the sync, the old line item will still appear with the budget value, and the cost will stop populating. For example, if a virtual tag value is removed, the associated line item will no longer accrue costs but will remain visible in the plan.
* **Question**: What happens when renaming a virtual tag value?

  **Answer**: When you rename a virtual tag, a ‘Sync required’ icon will appear, indicating that the plan needs updating. To sync with the new name, you must duplicate your financial plan. After duplicating, the old value will remain, and a new entry will be added for the new name.
* **Question**: Can I remove a line item entry that is not relevant anymore?\
  ​*Scenario*:

  You have a financial plan with the following keys:\
  \- Org\
  \- Team\
  \- App\
  After syncing, you notice two line items in the financial plan:\
  \- Org 1 - Team A - App A (old entry)\
  \- Org 1 - Team B - App A (new entry)\
  I want to remove the old entry and only keep the new one.\
  ​**Answer**: You can ignore an old line item by toggling it off. The line item data will not be deleted, but its data will not be included in the financial plan calculation. See [Input Custom Line Items](#input-custom-line-items).

#### **Duplicate your Financial Plan**

Duplicate your financial plan with all its settings and configurations and use it as a basis for making a new customized plan. This approach saves time and streamlines your workflow, making revising projects, adapting to new scenarios, or optimizing processes more efficient.

{% hint style="info" %}
**Note**: Only Admins can duplicate financial plans.
{% endhint %}

**To duplicate your plan**:

1. Navigate to **Financial Plans**.\
   You are brought to the **Financial Plans** list.

   <figure><img src="https://3858159242-files.gitbook.io/~/files/v0/b/gitbook-x-prod.appspot.com/o/spaces%2FWqjB2puKXPDR7L86FX2e%2Fuploads%2Fcv6K6J8fOAKkNUk5JHjC%2Fimage.png?alt=media&#x26;token=7052d88b-533d-4270-94e1-d5082349ede6" alt=""><figcaption></figcaption></figure>

   <figure><img src="https://downloads.intercomcdn.eu/i/o/20208114/c05579c6d7bbebae7e4158be/image.png?expires=1727308800&#x26;signature=0d515de05f596665dfb1663f29d8ebd76cf9ee07efb571276df2c9e9131774e6&#x26;req=0tVtxVD7rTNk2hj99dpg6uqf3m3NEkP7IT6tRsD8Bx6hMuJwF4zWlPVbISnC%0AXftBP61nK9f6I7fAVcyRA8zN%0A" alt=""><figcaption></figcaption></figure>
2. Choose a financial plan.\
   You are brought to the **Financial Plan Details** tab.

   <figure><img src="https://3858159242-files.gitbook.io/~/files/v0/b/gitbook-x-prod.appspot.com/o/spaces%2FWqjB2puKXPDR7L86FX2e%2Fuploads%2FdlcaCQtcl6McExYcheGU%2Fimage.png?alt=media&#x26;token=00d3f9e7-a995-4b1e-9dea-caba78ac3eb9" alt=""><figcaption></figcaption></figure>

   <figure><img src="https://downloads.intercomcdn.eu/i/o/20210224/21f08df6083120e7037e9e30/image.png?expires=1727308800&#x26;signature=492df866db9ade973ea7e29cbba97ad36c3bf21247a5bf66c52d727d0dffcba8&#x26;req=0tVtxFj4rjNk2hj99dpg6gdN2gk2KTGe8k76kdShopceccAt3rM9Ff6jUxs0%0AENMVP%2BXr0WWVMmaHwjIIbzEC%0A" alt=""><figcaption></figcaption></figure>
3. Click![](https://lh7-us.googleusercontent.com/docsz/AD_4nXf_5emtE1rfZHBdCGzAPUC9ksu__cZkhl3P3XesNV6buOj3c0lrWWqXHJ04TS2jGODrcHni5sXeQn8flB8K8EIigJJPpR-bWpIbRobACSBftmruLXzipKbF-Ah8gpVv4afY2yhTsmjKOur7u84KrNyeqjNu?key=fjqBSIeK_DDgXRG_cRbrLA)and then click **Duplicate Plan**.\
   The Duplicate Financial Plan window appears.\
   ![](https://3858159242-files.gitbook.io/~/files/v0/b/gitbook-x-prod.appspot.com/o/spaces%2FWqjB2puKXPDR7L86FX2e%2Fuploads%2FBcg37rhAq6Cy6jzsd4U3%2Fimage.png?alt=media\&token=d05f3787-fbd0-4603-86be-cb323d294a81)
4. Add a new name and click **Duplicate**.\
   The plan is duplicated.

**To delete your financial plan**:

1. Navigate to **Financial Plans**.\
   You are brought to the Financial Plans list.

   <figure><img src="https://3858159242-files.gitbook.io/~/files/v0/b/gitbook-x-prod.appspot.com/o/spaces%2FWqjB2puKXPDR7L86FX2e%2Fuploads%2Fw9DSDbKxqongSQDVZsCt%2Fimage.png?alt=media&#x26;token=4e89e329-d92f-4ad5-9ce1-887006648ba7" alt=""><figcaption></figcaption></figure>

   <figure><img src="https://downloads.intercomcdn.eu/i/o/20208791/562414b640b9e703fa27cb45/image.png?expires=1727308800&#x26;signature=42e38a6615410d3998a323cb58d147fddc78643774653059a3564d19a0ba6a01&#x26;req=0tVtxVD9pTZk2hj99dpg6rYBfrnWn4rRbLQ4c2L%2FoPdmGHoLkzeWvJ4p29Ig%0ApEfEtavZs8wLRNNJgIoiGacD%0A" alt=""><figcaption></figcaption></figure>
2. Click![](https://lh7-us.googleusercontent.com/docsz/AD_4nXf_5emtE1rfZHBdCGzAPUC9ksu__cZkhl3P3XesNV6buOj3c0lrWWqXHJ04TS2jGODrcHni5sXeQn8flB8K8EIigJJPpR-bWpIbRobACSBftmruLXzipKbF-Ah8gpVv4afY2yhTsmjKOur7u84KrNyeqjNu?key=fjqBSIeK_DDgXRG_cRbrLA)next to the financial plan you want to delete and then **Delete Financial Plan**.\
   The Delete Financial Plan pop-up appears.

   <div align="left"><figure><img src="https://3858159242-files.gitbook.io/~/files/v0/b/gitbook-x-prod.appspot.com/o/spaces%2FWqjB2puKXPDR7L86FX2e%2Fuploads%2FoLtMd4V5PpKSf09qs3mf%2Fimage.png?alt=media&#x26;token=8b003623-dab2-45f7-a92a-33612d18f8b5" alt=""><figcaption></figcaption></figure></div>

   <div align="left"><figure><img src="https://downloads.intercomcdn.eu/i/o/19621239/b2584516efdbadb34f961fbc/image.png?expires=1727308800&#x26;signature=9f29025c1ef3d63e2a29548a3e5758d85d4381c1adda41db423e200c6c568041&#x26;req=0dxpx1n4rz5k2hj99dpg6rcPLiBCJJaUrHd2P%2B51Gw1q6UsUM%2BcCX7qQZeBV%0AvCthB5swHKk9HIrTrO3%2B0pFU%0A" alt=""><figcaption></figcaption></figure></div>
3. Click **Delete**.\
   The Financial Plan is deleted.​

### Dashboard <a href="#h_e0181fe78e" id="h_e0181fe78e"></a>

The dashboard view provides a visual representation of your financial plan through widgets that display actual costs and budgets. This view allows you to quickly assess your financial status at a glance, identify any discrepancies between planned and actual expenditures, and make informed decisions based on real-time data. The dashboard's visual nature makes it easier to understand complex financial information and track your progress.

1. **Time frame** - Filter for specific months, quarters, halves, or years.
2. **Key Filters** - Filter keys that you chose in the configuration process.
3. **Aggregate By** - You can aggregate the data by keys you chose in the configuration process.

   <figure><img src="https://downloads.intercomcdn.eu/i/o/20203344/7db53cea6c49aacdf472430b/AD_4nXdgrRqdowJxw0r5AN2_kcgruYMzbESUVnoTI2HYFE3KRKuiqyliG1glWAAR3hITVaAEMh698lieAAKsqO2iVh0rihcfT6YhDCItroHJabNeCzsUpjsk1OFOBkI1nSy_cFfRI7UhjVEoDqUl55BV-l4ayAxj?expires=1727308800&#x26;signature=170c678ae9e9fa8bbfc1d89d4c348bf3845e6518771af8e5207fc8112e4a3115&#x26;req=0tVtxVv5qDNk2hj99dpg6m%2B97ADvszPPVK1gvgZ5L8UhpxlJNXrEAsnlq%2FcC%0APIdL6qnVYG%2BrtOXXFv5ViEPh%0A" alt=""><figcaption></figcaption></figure>
4. **Cost Summary**: This enables you to compare actual spending against budgeted targets, track performance, and make informed adjustments to stay within financial goals. This widget includes:\
   -*Actual Cost:* The total accumulated expenditures for the selected period and filters. It provides insight into how much has been spent within the specified timeframe.\
   -*Budget*: This displays the total accumulated budgeted amount for the same period and filters. It represents the financial targets set for the selected timeframe.\
   -*Delta*: Delta highlights the difference between two selected metrics—such as Actual Cost, Forecast, Run Rate, or Budget—for a given period and filters. This customizable metric helps analyze financial trends and deviations based on the specific metrics selected.

   <figure><img src="https://downloads.intercomcdn.eu/i/o/20203467/a379fb449d0071924322aa45/AD_4nXcIImylNwSZU8Vo9pNu_ShKNIiGwLi3yF26snPdyZSPkbxHCu8py4rqp6xAmql5OxSDi8cvRyjP-5PXs4DMhBvv3bLm0ujDF_qflQpubF7SEriB7DqOlLmZuLySIxnk3UsuvH3WJL7g3nleJg4XZTAsRxU?expires=1727308800&#x26;signature=3e1b8e311077f4eec007956e2a650f9a5de1b984fab0251f73e28b25cb8e9ee7&#x26;req=0tVtxVv%2BqjBk2hj99dpg6tAd7HVbE49yaFCFaRv%2FUAhrSR7mDagUb1B5PHms%0Av6ll3nJLlr3U1ysA9nqpoKAa%0A" alt=""><figcaption></figcaption></figure>
5. **The Budget vs Actual** (by date) - Provides a visual comparison of your planned budget against actual expenditures over a specified time period. This widget lets you track your financial performance and identify discrepancies between your projected budget and real spending.

   <figure><img src="https://downloads.intercomcdn.eu/i/o/20203520/dd233fc28fbd8f2f0b9b5a5d/AD_4nXfPCxjqKBX4J4TNIQFt-Up5JFimrkgdOgF7MaJqA5vlEGDwVwCBBMy9AMwzwv1gA1PfivOxhZgP97sXwe39YHKKGnb-4S7CtqzXPpd1r16xYDOBfRvVDv8Vlaj_MHyNDNk8Uhz1o7HmNKWd1dAR0ikaP-45?expires=1727308800&#x26;signature=940bdb5d74c4a7ee48815d5660aa516992c25de66421c59bfc28085d2fc849b4&#x26;req=0tVtxVv%2Frjdk2hj99dpg6vsgkXriF0vcPJgvBII4fMGnNvVe3Vq98igR9axi%0AcmjdSVbXkwcRWU%2BxdCg2ydBA%0A" alt=""><figcaption></figcaption></figure>
6. **The Budget vs Actual** (by value) - Provides a visual comparison of your planned budget against actual expenditures per value. This widget lets you track your financial performance and identify discrepancies between your projected budget and real spending per value.

   <figure><img src="https://downloads.intercomcdn.eu/i/o/20203582/3549026c99389ce478dc1f23/AD_4nXd_k9fX7pg4X2qyjSpQMDaEGYJLDDXreo3cNfcBv2_ydUUpe62qCrq1uexklSrNfhPlkqxv4nqNS90Hti6lXNdaUsal7fq_GX9Vootn4prwzcc4BfHOqSOu2kM2H2NfGwXEDsc3KLjH4PnoMH9B84C2Sstg?expires=1727308800&#x26;signature=7f84a36da462fbc592c9d58f2fd7d0da2a706b15b560737750cde1ae4ba1d955&#x26;req=0tVtxVv%2FpDVk2hj99dpg6soDhTrek9%2FaMRpLNsvX0otV3x2BLmdYlFODoVa3%0A%2F2z9p34vGAXK09VkcuOy3Z2j%0A" alt=""><figcaption></figcaption></figure>
7. **Budget Value Performance**—This widget provides a clear overview of your budgets per value by displaying three key metrics: cost, budget, and delta. It shows actual expenditures (cost), the planned, budgeted amount (budget), and the variance between them (delta). This widget lets you track and compare your spending against your financial targets per value, helping you identify discrepancies and make informed adjustments to stay aligned with your budget and financial goals.

   <figure><img src="https://downloads.intercomcdn.eu/i/o/20203647/6b3f349dcb050b6dae6f64d6/AD_4nXcw9gQXyCiCMcz4cGbvAc1k9g5vhEN3cSDe3kfkUwEdstr10x8R_M_H45XGd43ckNOcEZuSFTC1o_FJW12XXZgCwUMd_OqNS0MPfSUqKNV5npimwy_v6-OzzjIaE_7Iu1VlJN6WuMzmi31mrHu9dPLNx08?expires=1727308800&#x26;signature=582784202347fe60d75b1a8673357953651a3b87374a8faa1638458d89431892&#x26;req=0tVtxVv8qDBk2hj99dpg6rM607SwB1x%2FutajZ%2B6TIjfAsaZXU%2FbcAjBGnjO7%0AZmmx1Rn6NP%2FZk2EZM1zENK5S%0A" alt=""><figcaption></figcaption></figure>
8. **Actual Costs Trend** - Displays the ratio between the cost of the current month and the cost of the previous month. Tracking these ratios allows you to observe trends and patterns in your spending over time. By visualizing these monthly ratios, you can easily identify periods of significant increases or decreases in spending, assess financial performance, and make data-driven decisions to manage your budget more effectively.

   <figure><img src="https://downloads.intercomcdn.eu/i/o/20203682/10ba42d84d6fb7d96ecedaf9/AD_4nXfUbDccK5qh61ZXcgZcGDNGzawqNHEAq8ABXPmd0ToJbh2Q6AsLzxIvm6vlZCzixkBZHj5M_8z8JkbJ_-IgbezQdM0oz6XGUJ8moB3oDabWLCcf4_sFt6VaZWtSoMKOstiUBaKAZpo1eiDbW_ua2eToWdPZ?expires=1727308800&#x26;signature=d7a5cced2dce8279fbcc233dcfb70e4ac8913a495790a3ad31b3382d521ca125&#x26;req=0tVtxVv8pDVk2hj99dpg6rumQPGSMc26p5MvA9IuqJI5I1HNiMztiaU%2FMXxP%0Anb9xRQHLsdVPZlnkzhORXg00%0A" alt=""><figcaption></figcaption></figure>

### Plan Completion Rate <a href="#h_00029f968c" id="h_00029f968c"></a>

The Plan Completion Rate tab allows you to track the percentage of line items with budget values in their financial plans. This enables you to monitor the status of budgeted line items per quarter. By monitoring the completion rate, users can ensure that all necessary items are accounted for and budgeted, maintaining the accuracy and completeness of their financial plan. This feature provides a clear view of financial planning progress and highlights any areas needing attention or adjustments.

**Completion Rate Calculation**

The completion rate is calculated using the following formula:

<figure><img src="https://finout.intercom-attachments.eu/i/o/18128912/4ee0ad9c29c61d88d65e67d1/AD_4nXeNM9kYRieZjCyAGZkGrIUen4z5Jd4xZmoPztfAq7cVyYy9Chieom1-wy7cL6JZlHxOrOUC6EHxARXnU4FfVu05zWs0fHEhBA9VuE-9iaoRMSI06mXlMNssTa4jGRArTY2bGgTlFpICFDJxonfc1seqTSs?expires=1727308800&#x26;signature=950b2f32995a3fe4d5626fc2ecff63ea4552e9425344a98ca8bd0a0f7201ae47&#x26;req=0d1ux1DzrTVk2hj99dpg6jOzcATSopxNROK1ejhEgdizvAHNLgYqr2oQNsB9%0AT5D2P%2FvzCutYADfhxFkAV6BT%0A" alt=""><figcaption></figcaption></figure>

<figure><img src="https://3858159242-files.gitbook.io/~/files/v0/b/gitbook-x-prod.appspot.com/o/spaces%2FWqjB2puKXPDR7L86FX2e%2Fuploads%2Fi3FJE6YvgLNh3zxOIxaW%2Fimage.png?alt=media&#x26;token=59e93258-87b3-4340-9c74-fec063d0e27c" alt=""><figcaption></figcaption></figure>

1. **Search Bar** - Free search using keywords to find specific information.
2. **Time frame** - Filter for specific months, quarters, halves, or years.
3. **Key Filters** - Filter keys that you chose in the configuration process.

   The keys operate based on cascade filtering and ensure that filters are progressively refined according to the hierarchy established during configuration.

   When filtering for a specific department, users will only see the relevant groups in the filters. Selecting a department will show only the applicable group names.

   **Example**: Imagine the financial plan hierarchy is structured as follows:

   1. Department
      1. TLV
      2. NYC
   2. Group Names

   If you filter by a specific **Department**, you will only see the groups within that department. If you select TLV, you will see the following group names in the filter:

   * **TLV Department**:
     * Data
     * Core

   This hierarchical approach simplifies filtering data by ensuring that each step is more focused and manageable.
4. **Aggregate By** - You can aggregate the data by keys you chose in the configuration process.
5. **Status Indicators** - The completion status percentage of your financial plan is visually represented with colors according to the following thresholds:
   1. Green: 85% - 100%
   2. Yellow: 50% - 90%
   3. Red: 0% - 50%

### Add Metadata to Financial Plans <a href="#h_71f9175d15" id="h_71f9175d15"></a>

Once a financial plan is created, you can add custom columns to the financial plan by enriching the virtual tag values with metadata using the [Virtual Tag Metadata API](https://docs.finout.io/api/finout-api/virtual-tag-metadata-api).

{% hint style="info" %}
**Note**: You can only view custom metadata added to a value of the lowest virtual tag in your hierarchy.
{% endhint %}

**Use Case Example**:

Your current virtual tag and values:

You have created a financial plan with a “Dev Teams” virtual tag. This **Virtual tag** contains the following **Values**:

* Infrastructure
* Legacy App
* Core
* Data

<figure><img src="https://finout.intercom-attachments.eu/i/o/18128913/4b7acb8978b73d03ba97af07/AD_4nXe7LHs49Vbs0AxUT49TyqF7byGEOHmOEZn64C6h9NcfbLv9TV-RWD7eHFEbAVzofNC1mO4X3HMv_CY6YMczSkkUG2wcMJeo_Mfncl4tLV8GfhHU2664lJ3WrpXXotxYreycsQ8ijP5vRukp-1NxBQke4Y9D?expires=1727308800&#x26;signature=7face0cbf7e2b90c0b1c9b315f5fff255193a6e35799bb0e0557342485753394&#x26;req=0d1ux1DzrTRk2hj99dpg6iIHCi1kwSNVradRP4vd1LjihF9t6%2F6Ii%2FYYYSxT%0AQTXeOiVT1JRKsxhzAbnbeF%2FB%0A" alt=""><figcaption></figcaption></figure>

You want to add a new column with metadata for relevant value:

Add **Dave** as an **Owner** to the **Data** value of this virtual tag.

This is done by adding Custom Metadata to the value of the Dev Team virtual tag by using the [Virtual Tag Metadata API](https://docs.finout.io/en/articles/190851-virtual-tag-metadata-api-draft#h_b030924942).

{% hint style="info" %}
**Note**: After updating metadata for each value via API, you must [sync your plan](https://docs.finout.io/en/articles/176691-financial-plans#h_ff3a7edc14) in order to view the custom metadata column in the financial plan.
{% endhint %}

<figure><img src="https://finout.intercom-attachments.eu/i/o/18128915/4193cb20f85e940a3abe4d64/AD_4nXdWoWHo7SDF_tBDzhuyyt8lP-ZnJ2g-mVX418J3yUmZiOUafhT-Wi76C9L4PzqwEjUMV446TjQVea47HmWQmG4L5oaNTOlVbnd8xIzwd3a2SzVorpONKENFQEOdVB92JDsL2Diy3sdfrkSvWWppF7TGY8FP?expires=1727308800&#x26;signature=309bda670b998d29e9337d361d396a5bf9aabbf3878ec282b64078e306c4b962&#x26;req=0d1ux1DzrTJk2hj99dpg6jdtkD1rbMk6PFfp0QDOvZgTBrNa9l1wDpyqrSZ2%0ArbFvJ0zKqkjA64fgd3Xhk52%2F%0A" alt=""><figcaption></figcaption></figure>

**Result***:* A new column appears (Owner) with custom metadata (Dave) attached to a particular virtual tag value (“Data” value of the virtual tag “Dev Teams”).

**Custom Column Components**

The custom columns feature is configured based on the following components:

1. **Virtual tags** - The virtual tag chosen during your [financial plan setup](#h_5bfec57ebb).
2. **Virtual tag values** - The values in the virtual tag.
3. **Custom metadata** - Custom metadata that you want to attach to a particular virtual tag value.\
   ​

   <figure><img src="https://finout.intercom-attachments.eu/i/o/18128916/4188c080d57dde998ff92da6/AD_4nXeju2JWEbjYXmogHtGxqYC6wDtVX41GyTGxIlyWBAcw0a6fTvcNrHngMkf2cGJNAi8vfpsPeKOR4UdMW9prwC8dVMgPQfhqcg07g8UG1R22mzN68FNWZ60BkRV63Nlv8MJQKF72kc3LbjKkCHuNdrsIfPM-?expires=1727308800&#x26;signature=adef8c87d166807ee6099294745af260aa01cbcb1cc6fe918a8df9a94aea6f7b&#x26;req=0d1ux1DzrTFk2hj99dpg6mMwy0kNQmjGI3L1InDSR5lb50IDeGI29kXIioJz%0AiSZOsWkt9qmlxelyrc75b01K%0A" alt=""><figcaption></figcaption></figure>

### Financial Plans List

The Financial Plans list is your central workspace for managing all financial plans in Finout. From this page, you can quickly search for existing plans, create new financial plans, open multiple plans in separate browser tabs for comparison, adjust plan settings, and delete plans when they are no longer needed.

<figure><img src="https://3858159242-files.gitbook.io/~/files/v0/b/gitbook-x-prod.appspot.com/o/spaces%2FWqjB2puKXPDR7L86FX2e%2Fuploads%2FCG3IpzUb3TvgfzEUyatT%2Fimage.png?alt=media&#x26;token=91f6c3b9-5017-4b22-9f51-2b948a500291" alt=""><figcaption></figcaption></figure>

1. **Search Financial Plans -** Quickly search financial plans using the search bar.
2. **Create Financial Plan** - [Create a new financial plan](#h_5bfec57ebb) to define budgets and track cloud spending against targets.
3. **Open Multiple Financial Plans** - You can open a financial plan in a new browser tab directly from the financial plan list.\
   Right-click the financial plan and select **Open in New Tab**, or use:

   * **Command + Click** on macOS
   * **Ctrl + Click** on Windows or Linux

   This allows you to compare multiple financial plans side by side or keep several financial plans open at the same time.
4. **Financial Plan Settings** – Edit a financial plan's configuration in the [settings](#plan-settings-and-controls).
5. **Delete Financial Plan** – Permanently delete a financial plan that is no longer required.


---

# Agent Instructions: Querying This Documentation

If you need additional information that is not directly available in this page, you can query the documentation dynamically by asking a question.

Perform an HTTP GET request on the current page URL with the `ask` query parameter:

```
GET https://docs.finout.io/user-guide/inform/financial-plans.md?ask=<question>
```

The question should be specific, self-contained, and written in natural language.
The response will contain a direct answer to the question and relevant excerpts and sources from the documentation.

Use this mechanism when the answer is not explicitly present in the current page, you need clarification or additional context, or you want to retrieve related documentation sections.
